
How can we help?
Step-by-step guides for everything in Schedool. Search, or pick a topic.
No guides match that. Try other words, or ask the help assistant (bottom right) – it can pass your question to the Schedool team.
🚀 Getting started
Start your free trial
Sign up from the website in about a minute. You get a 14-day free trial with no card needed, then choose a plan.
- Go to schedool.net and click Start free trial.
- Enter your business name and choose what kind of business it is – Schedool uses this to suggest your services and opening hours.
- Enter your name, your email and a password (at least 12 characters).
- Choose the plan you think you’ll need – you can change it any time.
- Tick to agree to the terms and click Create my account.
- You’re signed straight in and the Setup Helper opens to get your diary ready.
💡 Your trial lasts 14 days. You won’t be charged unless you add a card and choose a plan.
💡 If you start from one of the “Schedool for…” pages, your type of business is already picked for you.
Use the Setup Helper
The Setup Helper walks you through everything you need to start taking bookings, in nine short steps. Most take under a minute and the optional ones can be skipped.
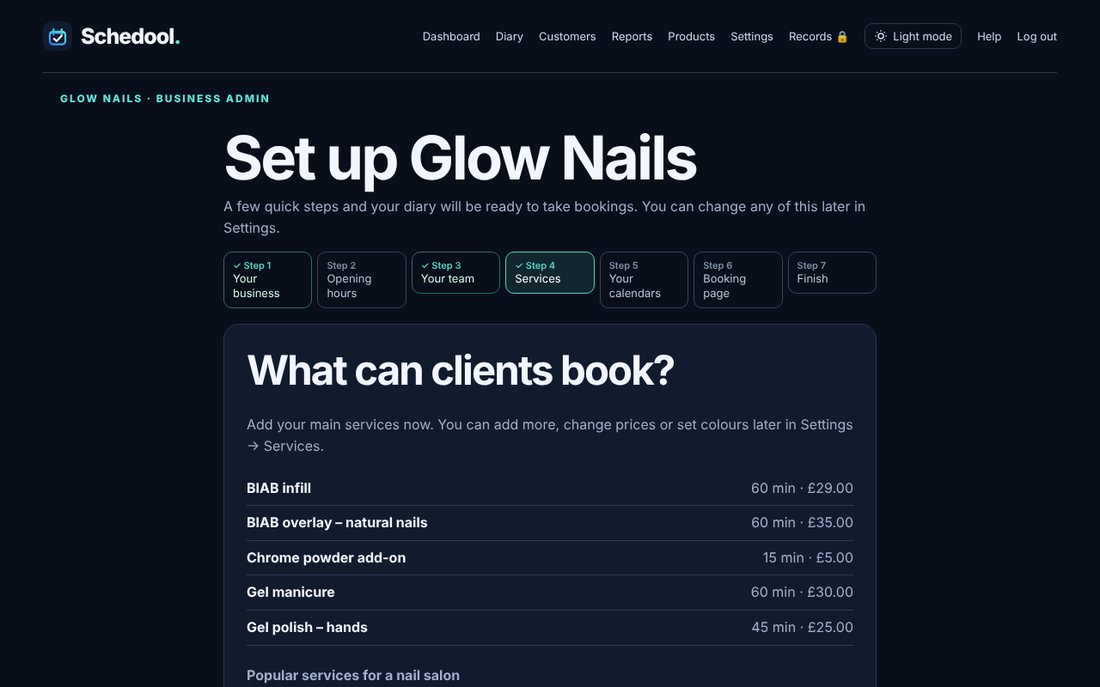
- It opens by itself the first time you sign in. You can reopen it any time from Settings → Setup Helper.
- Step 1 – Your business: name, type of business, time zone, and your logo if you have one. The logo appears on your booking page and emails.
- Step 2 – Opening hours: typical hours for your type of business are filled in for you. Change anything that’s different and add a lunch break if you like.
- Step 3 – Your team: add the people who take bookings (or just yourself).
- Step 4 – Services: tick the ready-made services you offer, change any name, length or price, and add your own.
- Step 5 – Reminders: switch on reminder emails and choose when they go (2 hours, the day before or 2 days before). You can see exactly what customers will get. If you have text credits you can add text reminders too.
- Step 6 – Card payments (optional): connect your Square account and choose whether customers pay nothing, a deposit or the full price when they book online.
- Step 7 – Customers & calendars (optional): upload your customer list from another system or a spreadsheet, and bring in Google, Outlook or Apple calendar events.
- Step 8 – Booking page (optional): pick your colour and booking page settings.
- Step 9 – Finish: copy your booking link, ready-made text for Instagram and WhatsApp, a QR code and poster, and a QR code to put the diary on your phone. A checklist shows anything still to do.
💡 Steps 2, 3 and 4 are needed before customers can book.
💡 You can skip and come back – nothing is lost.
💡 Reminder emails send from Schedool’s own mailbox straight away, so you don’t need to set up email first. You can switch to your own mailbox later in Settings → Email Configuration.
The Getting started checklist on your dashboard
Until your setup is complete, your dashboard shows a Getting started checklist with what’s done and what’s left. Each item links straight to the right step.
- Open your dashboard. The checklist shows how many items are done and a progress bar.
- Items marked ⚠️ are needed before customers can book online: opening hours, someone who takes bookings and at least one service.
- Click any item that isn’t done to go straight to that step of the Setup Helper.
- When everything is done the checklist disappears by itself.
- Don’t need it? Click Hide checklist. You can still reach everything from Settings → Setup Helper.
💡 Only the business owner and admins see the checklist.
💡 Booking link shared and phone app installed are ticked when you use the copy or share buttons on the Setup Helper’s Finish step.
Sign in and sign out
Sign in at schedool.net/app.php with the email and password you signed up with.
- Go to schedool.net and click Sign in (top right).
- Enter your email and password and click Sign in.
- To sign out, click Log out at the end of the menu.
💡 Forgotten your password? Click “Forgot your password?” under the Sign in button.
Reset a forgotten password
Use “Forgot your password?” on the sign-in page. We email you a link that works for 1 hour.
- On the sign-in page, click Forgot your password?
- Enter the email you sign in with and click Send link.
- Open the email from Schedool and click the link (check spam if you can’t see it).
- Choose a new password (at least 12 characters). You’re signed in straight away.
💡 The link works once and lasts 1 hour. You can ask for up to 3 links an hour.
💡 A team member who can’t sign in can do the same, or the business owner can set them a new password in Settings → Team.
Your dashboard
The dashboard shows today’s appointments and quick links to the things you use most.
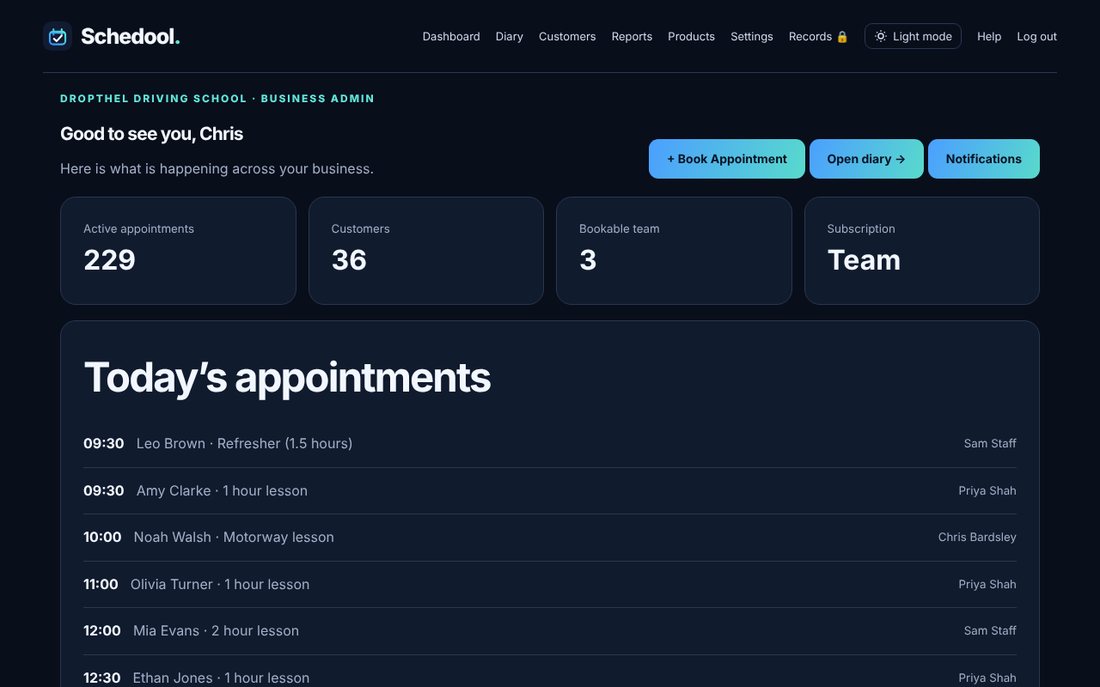
- Click Dashboard in the menu.
- See today’s appointments at a glance.
- Use the menu to go to the Diary, Customers, Products or Settings.
📅 Diary & appointments
Find your way around the diary
The Visual Diary shows the week as a grid, with a month calendar and the selected day’s appointments, breaks and classes listed on the left – the same as the app.
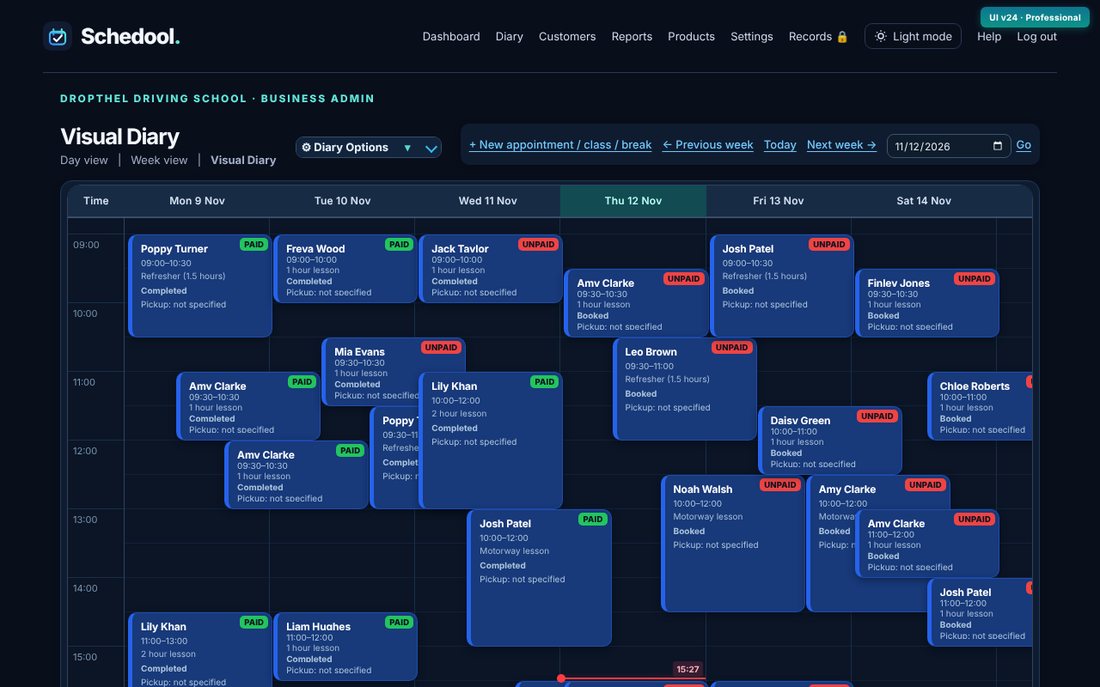
- Click Diary in the menu. The Visual Diary shows the week as a grid, with times down the side (each hour, plus 15, 30 and 45).
- On the left is a month calendar – dots show days with bookings. Click any date to jump to it, or use ‹ › to change month.
- Under the calendar is that day’s list of appointments, breaks and classes. Click one to open it, just like clicking it in the grid. Click a day’s name at the top of the grid to show its list.
- For more diary space, click ‹ Hide at the top of the panel. Click “Calendar & day list” to bring it back – Schedool remembers your choice.
- On a phone or smaller tablet, tap the calendar tab on the right-hand edge of the screen (or swipe in from that edge) to slide the calendar out.
- Use ← Previous week, Today and Next week →, or pick a date and click Go. Day view and Week view (lists) are under the heading.
- Open Diary Options to filter by team member and change what you see.
💡 Choose how many days to see with the Days buttons (1, 2, 3, 5 or 7) next to Today. Previous and Next then move by that many days, and on a phone you can also swipe the diary left or right. The row of week boxes above the diary (e.g. Nov 16 – 22) jumps straight to any week – the week you’re viewing is filled in green and this week has a green outline. Each phone, tablet or computer remembers its own choice – phones start at 3 days so nothing is squashed. You can still drag appointments to a new time or day in any of these.
💡 Set which view opens first in Settings → Diary Preferences.
💡 Each appointment shows a Paid / Unpaid badge in the corner (a green or red dot when the days are narrow).
💡 Click ‹ Hide on the calendar panel for more room. To bring it back, click the Calendar & day list tab down the left of the diary. On a phone, tap the small calendar tab on the right-hand edge of the screen (or swipe in from the right edge) and the calendar slides in; swipe it back to the right to close it.
💡 All 7 days fit across the screen on a computer or iPad.
Book an appointment
Click an empty time in the diary, choose Appointment, fill in the customer, service and team member, then click Book appointment.
- Open the Diary (Visual Diary is easiest).
- Click an empty time. In “What would you like to create?” choose Appointment. (Or use + New appointment / class / break at the top, or + in the app.)
- The form is in numbered boxes: 1 Customer, 2 Service, 3 Date and time, 4 Extra details. Each number turns into a green tick when that part is done.
- Choose the customer, then the service and team member. The start time is already filled in if you clicked the diary.
- Add a repeat, pickup and drop-off addresses, buffers or notes if you need them.
- Click Book appointment – the button tells you what’s still missing.
💡 If the time is outside working hours or clashes with something, you’ll see a warning. Managers can confirm and book anyway.
💡 New customer? Add them first in Customers.
Book repeating appointments
When booking, open “Repeat appointment” and choose how often and how many times.
- Start booking an appointment as normal.
- Open the Repeat appointment section.
- Choose how often (for example every week), which days, and when to stop (a number of times or an end date).
- Click Book appointment. Every repeat is checked for clashes first.
💡 If one of the repeats clashes you’ll be told which date, so you can change it.
Move or change the length of an appointment
In the Visual Diary, drag an appointment to a new time. Drag its bottom edge to make it longer or shorter.
- Open the Visual Diary.
- To move: press on the appointment and drag it to the new time, then let go and confirm.
- To change the length: drag the bottom edge of the appointment up or down.
- Or click the appointment to open it and change the date and time there.
💡 Breaks and classes can be dragged and resized in the same way.
💡 The customer is told about the change if reminders are switched on.
Copy and paste appointments, breaks and classes
Click an appointment, break or class, press Ctrl+C, then point at another time and press Ctrl+V.
- Click the appointment, break or class – it gets a yellow outline.
- Press Ctrl+C (Cmd+C on a Mac).
- Point at the time you want (or click it), even on another day or week, and press Ctrl+V.
- Confirm, and the copy appears.
💡 Appointments keep the customer, service, length, notes and addresses. Classes are copied without attendees.
💡 Press Esc to clear the yellow outline.
Edit or cancel an appointment
Open the appointment. The coloured buttons at the top take a payment, check the customer in or mark a no-show. The menu underneath has Check in, No-show, Cancel and Delete.
- Click or tap the appointment in the diary (or the app).
- Use the coloured buttons at the top: green Payment to take a payment, green Check in when they arrive, red No-show if they didn’t come.
- To change the customer, service, time, addresses or notes, open Edit / reschedule (in the app tap Edit) and save.
- To cancel, choose Cancel in the menu. Cancelled times become free again and the customer is told if notifications are on.
- To remove it without telling the customer, choose Delete instead.
💡 Colours in the menu: green = arrived, amber = no-show, red = cancel or delete.
💡 Only managers and admins can change other people’s appointments.
Delete an appointment without telling the customer
Open the appointment and choose Delete (the red bin at the bottom of the menu). It’s removed straight away and the customer isn’t emailed or texted.
- Click or tap the appointment in the diary or the app.
- Choose Delete at the bottom of the menu – it says “no email or text”.
- Check the details in the “Are you sure?” message and confirm.
- The appointment disappears from the diary. Any reminders waiting to go out are stopped, and package or pass time it used is given back.
💡 Use Cancel instead if you want the customer to be told.
💡 If money has been taken for the appointment it can’t be deleted – refund the payment first, or use Cancel, so your takings stay right.
💡 Deleting can’t be undone. Anyone who can change an appointment can delete it (staff only their own). Each deletion is kept in Settings → Activity history.
Add breaks and group classes
Click an empty time and choose Break or Class. Classes can have several customers booked in. Both can repeat – see “Repeat a break or class”.
- Click an empty time in the Visual Diary.
- Choose Break (time when you can’t be booked) or Class (a group session).
- Enter a title, team member and length. For a class, set how many people can attend.
- To make it repeat, choose under Repeat – every day, week, fortnight, month or a custom pattern.
- Save. It appears on the diary straight away – even outside your opening hours, the diary stretches to show it.
- To add people to a class, click the class and add customers in the popup. Drag to move, drag the bottom edge to resize, or click to edit or delete.
💡 Breaks and classes stop online bookings at those times.
💡 For whole days off, use Settings → Working Hours → Days off & holidays. For a lunch break every working day, you can also set it under Settings → Working Hours.
Repeat a break or class
Breaks and classes can repeat just like appointments: every day, week, fortnight, month, or a custom pattern such as every 3 days or Mondays and Wednesdays.
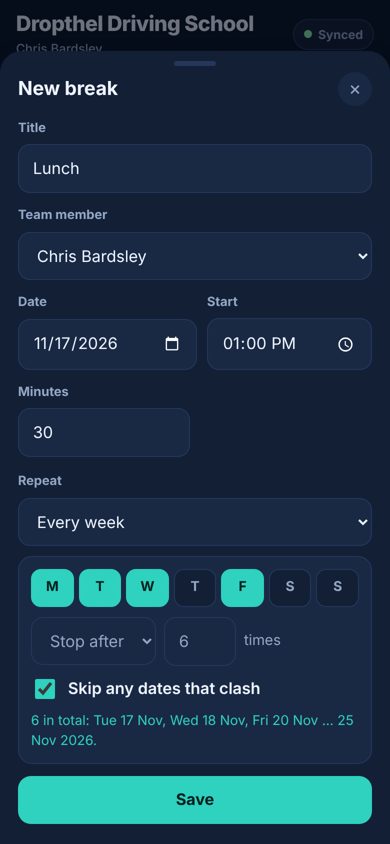
- Click an empty time and choose Break or Class (in the app, tap + then Break or Class).
- Under Repeat, choose Every day, Every week, Every fortnight, Every month or Custom. Custom lets you pick every 1 to 12 days, weeks or months.
- For weekly repeats, tap the days it should happen on – for example Mo, We and Fr.
- Choose when it stops: after a number of times, or on a date.
- Leave “Skip any dates that clash” ticked to leave out any dates where something is already booked. Untick it if you’d rather nothing is saved when a date clashes – you’ll be told which date.
- The line underneath shows what will be created. Save.
💡 To repeat a break or class you’ve already made, click it and use “Also repeat on more dates”. The one you clicked stays as it is and copies are added.
💡 Up to 104 dates at a time.
💡 Monthly repeats keep the same date; months without it (like the 31st) are skipped.
Why does it say outside working hours or overlapping?
Schedool warns you when a booking is outside working hours, during a break, on a day off or clashes with another booking.
- Read the warning – it tells you exactly what the problem is.
- To fix it properly, change the time, or update Settings → Working Hours.
- Managers and admins (and staff in their own diary) can confirm the warning and book anyway.
💡 “Working hours are not set up” means hours haven’t been saved for that day or person yet.
Record a no-show
Open the appointment and tap the red No-show button. It counts in Reports, and that customer isn’t sent a review request.
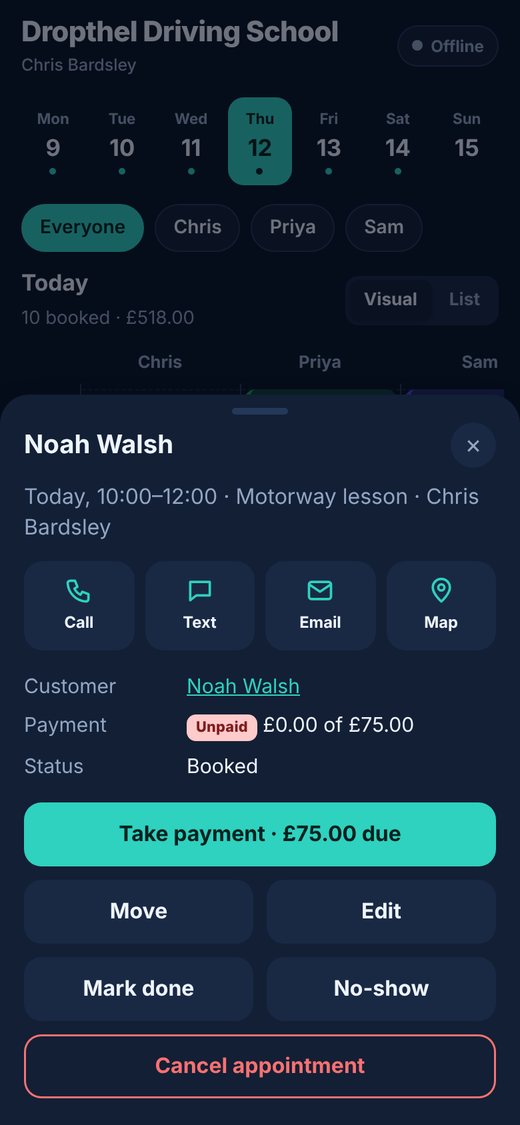
- Open the appointment in the diary or the app.
- Tap the red No-show button at the top (or No-show in the menu underneath).
- If it’s already checked in, choose Mark as no-show in the menu.
- Changed your mind? Set it back to Completed, or tap They came after all in the app.
💡 A no-show keeps the time as used, so the slot isn’t offered to the waiting list.
Leave a note for the customer on an appointment
Add a note to any appointment and the customer sees it in their account – what you covered, homework, or aftercare advice.
- In the diary, open the appointment and choose Add a note for the customer (in the app: open the appointment and tap Add a note for the customer).
- Write the note and Save.
- The customer sees it under that appointment in their account. Leave it empty to remove it.
💡 Staff can add notes to their own appointments; managers to any.
💡 The app saves notes offline and sends them when you’re back online.
💡 This is different from your private appointment notes, which customers never see.
Buffer time before and after appointments
A buffer keeps time free before or after an appointment – for travel, setting up or cleaning down. It shows on the Visual Diary as a grey striped block, and nobody can be booked into it.
- To set a buffer for every booking of a service: Settings → Services, edit the service and fill in Buffer before and Buffer after (minutes).
- To change it for one appointment: click the appointment in the diary, open Edit, change Buffer before or Buffer after, and save.
- The buffer shows as a grey striped block just above (before) or below (after) the appointment on the Visual Diary.
💡 Online bookings and the staff app both leave buffers free, so no one can be booked into them.
💡 Buffers on cancelled appointments disappear along with the appointment.
Hide customer names on the diary (privacy mode)
Tap the privacy button at the top of the diary to blur customer names and pickup addresses, so someone next to you – like the pupil in the car – can’t read them. You still see every appointment, its time, service and payment badge.
- On the website, open the Diary and click 👁 Hide names in the bar at the top. Click 🙈 Show names to bring them back.
- In the app, tap the eye button next to Week / Day / List. Tap it again to show names.
- Tap any appointment to open it as normal – its details show in full.
💡 It stays on until you turn it off, on that device – including after you close the app.
💡 It blurs names in every diary layout (week, day and list), the day list beside the calendar, the Today card and test reminders.
💡 Each device remembers its own setting, so turning it on on your phone doesn’t change your laptop.
👥 Customers
Add and edit customers
Go to Customers, fill in the Add customer form and save. Click a customer to edit them.
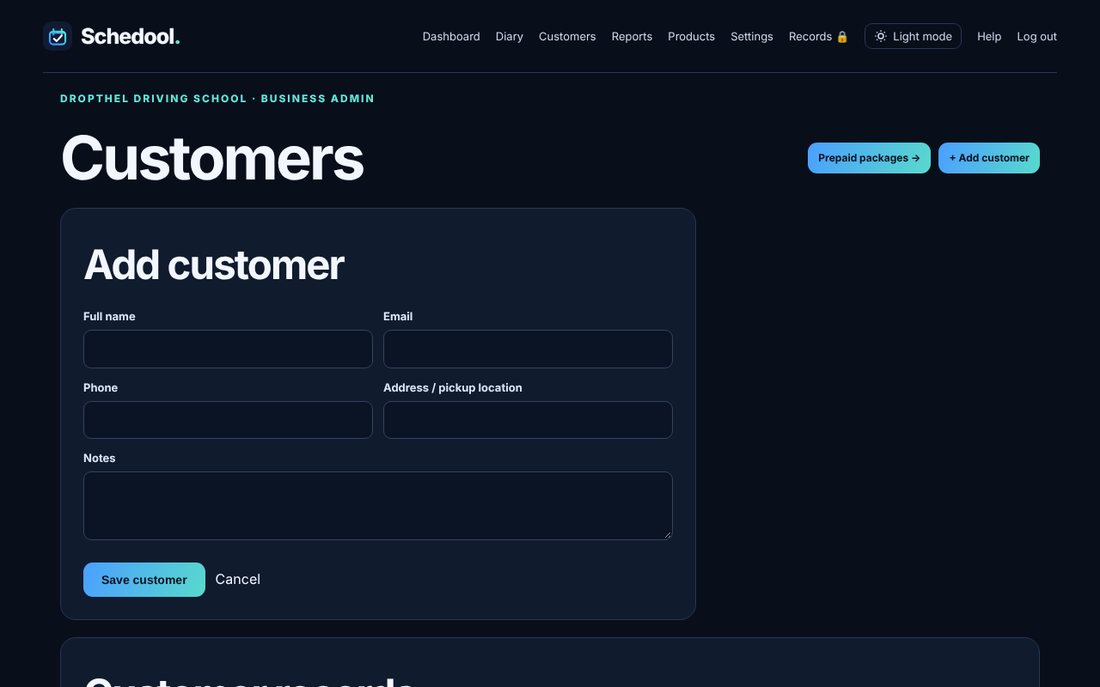
- Click Customers in the menu.
- Fill in their name, email, phone, address and any notes.
- Click Save customer.
- To change details, click the customer, edit and click Save changes.
💡 Saved pickup locations appear when you book them in.
💡 Customers who book online are added automatically.
Can I delete a customer?
There’s no delete button for customers, so their appointment and payment history stays complete. Archive them to hide them from your list, and Schedool can remove their data if they ask.
- To tidy up your list, open the customer and choose Archive customer. They’re hidden from your list and booking screens, and you can restore them later – see “Archive a customer”.
- To change their details, update or clear them and save.
- If the customer asks for their personal data to be deleted, contact Schedool through the Contact page with their name and email, and we’ll remove it for you.
💡 Keeping the record means past appointments and takings still add up correctly.
See a customer’s history and credit
Open a customer to see their appointments, payments, credit and passes.
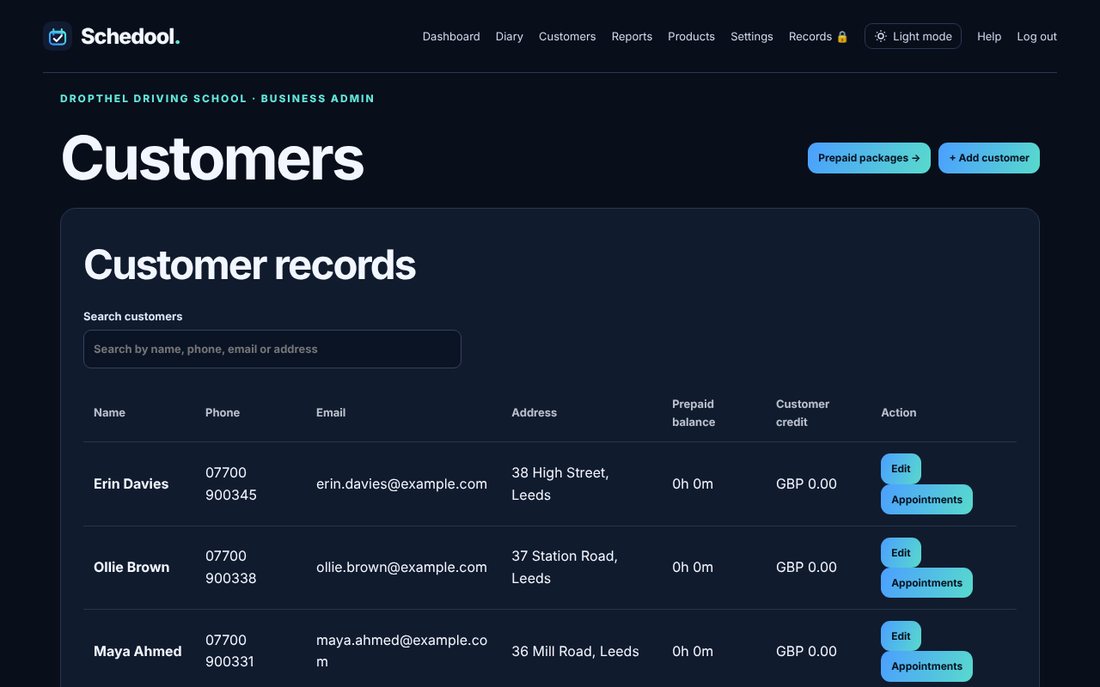
- Click Customers, then the customer’s name.
- See their recent credit activity, transactions and appointments.
- Add a prepaid pass or package from their record.
Invite a customer to their online account
Open the customer and click “Invite to an online account”. They get an email to choose their own password.
- Open the customer (they need an email address).
- In the Online account box, click Invite to an online account.
- They get an email with a link to choose a password (the link lasts 3 days).
- Once active, they can sign in to see their appointments and book again.
💡 If they’ve forgotten their password, the same box offers “Send a link to reset their password”.
💡 Passwords are never emailed.
See the emails, texts and messages you’ve sent
Emails: Settings → Sent Emails (or Notifications & Reminders → Notification history). It lists confirmations, reminders, welcome emails and password links. Texts: Settings → Text Messages → Recent texts. Conversations with customers: Messages.
- Go to Settings and click Sent Emails, or type “sent” in the Settings search.
- Each line shows the email (confirmation, reminder, welcome email, password reset…), whether it was sent, who it went to and when.
- Click a line to see exactly what was sent, and any delivery error.
- If a welcome email says “Not sent”, click it to see why. For example, the customer already has an online account or was already sent one. To send another, open the customer and click Resend welcome email.
- For texts, go to Settings → Text Messages and scroll to Recent texts.
- For messages with customers, open Messages, or Settings → Messages from Customers.
💡 “Sent” means it left Schedool. It can’t prove it reached their inbox, so if a customer says they didn’t get it, ask them to check their junk folder.
💡 Password links in the history are hidden for security.
How Schedool stops the same customer being added twice
Before adding anyone, Schedool checks your customers for the same email address, or the same mobile number with the same first name. Online bookings and sign-ups then use the existing record. When you add a customer yourself, you get a “Possible duplicate” warning.
- When a customer books online, joins the waiting list, buys a pass or creates an account, Schedool looks for them first. It ignores capitals and spaces in the email, and treats +44 7700… and 07700… as the same number.
- If it finds them, the booking goes on their existing record. Any missing email, phone or address is filled in, but nothing you’ve already entered is changed.
- If they already have an online account, or were already invited, they aren’t sent another invite.
- When you add a customer in Customers → Add customer and they match someone, you’ll see “Possible duplicate” with a link to open their record.
- If it really is a different person, for example a brother or sister sharing a parent’s phone, tick “Add as a separate customer” and save again.
💡 A different first name on the same phone counts as a different person, so families can share a number.
💡 Archived customers are checked too. Someone coming back after a break is put back on their old record.
Import customers from another booking system
Export your customer list from your old system as a CSV file, then upload it on Settings → Import & Export. You see a preview first, customers already in Schedool aren’t added twice, and no emails or texts are sent.
- In your old system (Ovatu, Fresha, Timely, Setmore…), export your customers as a CSV file. In Ovatu it’s Customers → Export.
- In Schedool, go to Customers and click Import customers (or Settings → Import & Export).
- Choose the file and click Check file.
- Check the preview: new customers, customers already in Schedool, and any rows that will be skipped.
- Tick any extra columns you want to keep (like a licence number) – each becomes one of your customer fields.
- Choose whether to bring over credit balances, then click Import.
💡 Customers are matched by email, then phone number, so you can safely upload the same file again.
💡 Names, addresses, postcodes, dates of birth, notes, credit balances and “SMS unsubscribed” are all understood.
💡 To bring appointments over too, use Import appointments from a spreadsheet on the same page.
Archive a customer
Archive customers who’ve finished or left. They’re hidden from your customer list and booking screens, but nothing is deleted and you can restore them any time.
- On the website, go to Customers and click the customer’s name. In the app, open Customers and tap them.
- Click Archive customer (in the app, tap Archive customer and confirm).
- They disappear from your customer list and from the customer picker when booking. Their appointments, payments, notes and history are all kept.
- To see them again, click Show archived customers at the top of the list, open the customer and choose Restore customer.
💡 Upcoming appointments stay in the diary – cancel them first if they’re not going ahead.
💡 If an archived customer books online again, they come out of the archive automatically.
💡 Only managers and business admins can archive customers.
Date of birth, postcode and your own customer fields
Every customer can have a date of birth and postcode, and you can add your own fields – text, dates, numbers, yes/no or a dropdown list – in Settings → Customer Fields.
- Open Settings → Customer Fields (or Customers → Customer fields).
- Date of birth and postcode are built in. Tap Edit on any field to rename it or make it required, Hide to stop asking for it, or Delete to remove it. A deleted built-in field can be brought back with Restore at the bottom of the list.
- Under Add your own field, type a name (for example Licence number), choose the type and tap Add field. Dropdowns need at least two options, one per line.
- Use ↑ ↓ to change the order. Edit also lets you change a dropdown’s options.
- The fields appear when you add or edit a customer, on the website and in the app.
💡 Hiding a field keeps anything already saved. If a field already has answers, tick Also delete saved answers before you delete it – those answers can’t be brought back, even if you restore the field.
💡 Name, email, phone, address and notes are part of every customer record, so they aren’t in this list.
💡 Date of birth shows the customer’s age next to it.
Link a child or family member to a parent’s account
On a customer’s page, Family and reminders shows who books for them, and lets you link them to a parent’s (or carer’s) online account.
- Open the customer’s page.
- Under Family and reminders, open Link to a family account.
- Enter the parent’s account email and who the customer is to them, then Link.
- Use Remove link to undo it.
💡 The parent needs their own online account first.
💡 The same box shows the customer’s reminder choices, set in their account.
Record a test or exam date (with a countdown)
Add a customer’s test or exam date and it shows in the diary, on your dashboard, in the app and in the customer’s account, with a countdown (“in 12 days”). Afterwards, record the result – Passed or Not passed.
- Open Customers and choose the customer (or tap them in the app).
- Under Driving tests (Tests and exams for other businesses), choose Add a test.
- Pick the type – for example Practical driving test, Theory test or Mock test – or type your own.
- Enter the date and time, and the test centre or place if you like.
- Leave “Show it in the customer’s account” ticked so they see the countdown too, then save.
- After the test, open it again, set the result to Passed or Not passed and save.
💡 Upcoming tests for the week appear in a strip above the diary, and the next six weeks are on your dashboard.
💡 In the app, tests show in the day’s list, and an appointment for that customer shows “Test in 5 days”.
💡 Recording a result can send a review request – see “Ask for a review when a test result is recorded”.
💡 You can add tests in the app with no signal; they’re sent when you’re back online.
🧑🏫 Services & team
Add and change services
Services are what customers book. Each has a length, a price and who can book it.
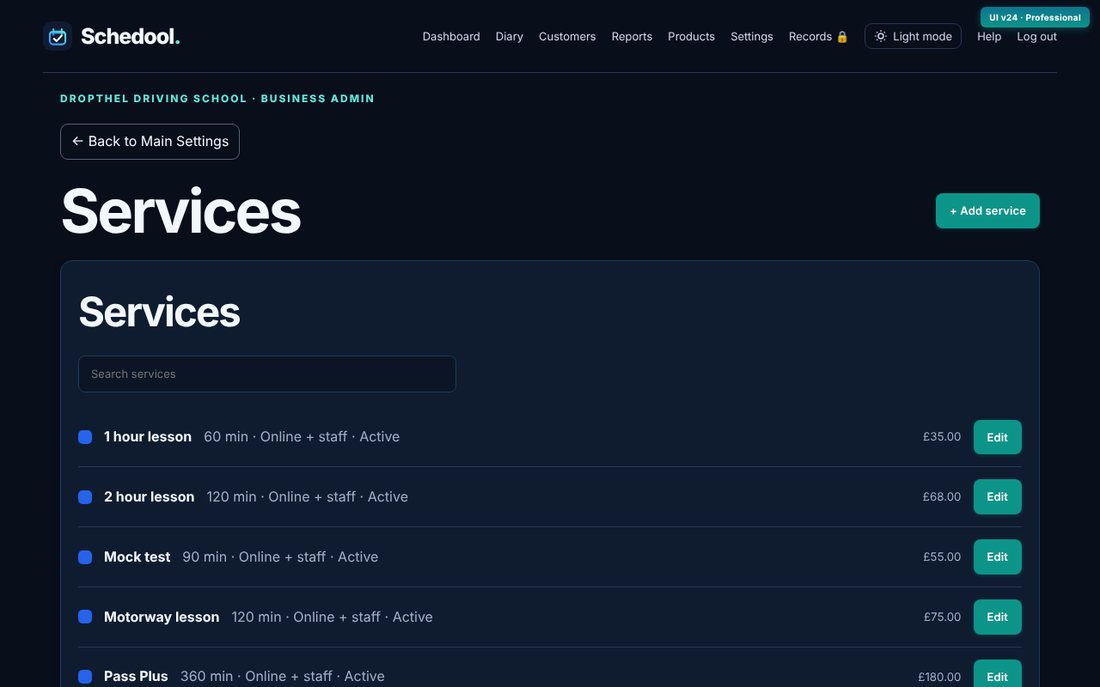
- Go to Settings → Services.
- Fill in Create a service: name, length in minutes, price and any buffer time.
- Under “Who can book this service?” choose online and in-house (customers can book it online) or in-house only.
- Click Add service.
- Click a service to edit it, set its diary colour, or remove it.
💡 Only services set to online and in-house appear on your booking page and website widget.
💡 Changing a price doesn’t change appointments already booked.
Add team members
Add the people who work with you in Settings → Team. Choose their role and whether customers can book them.
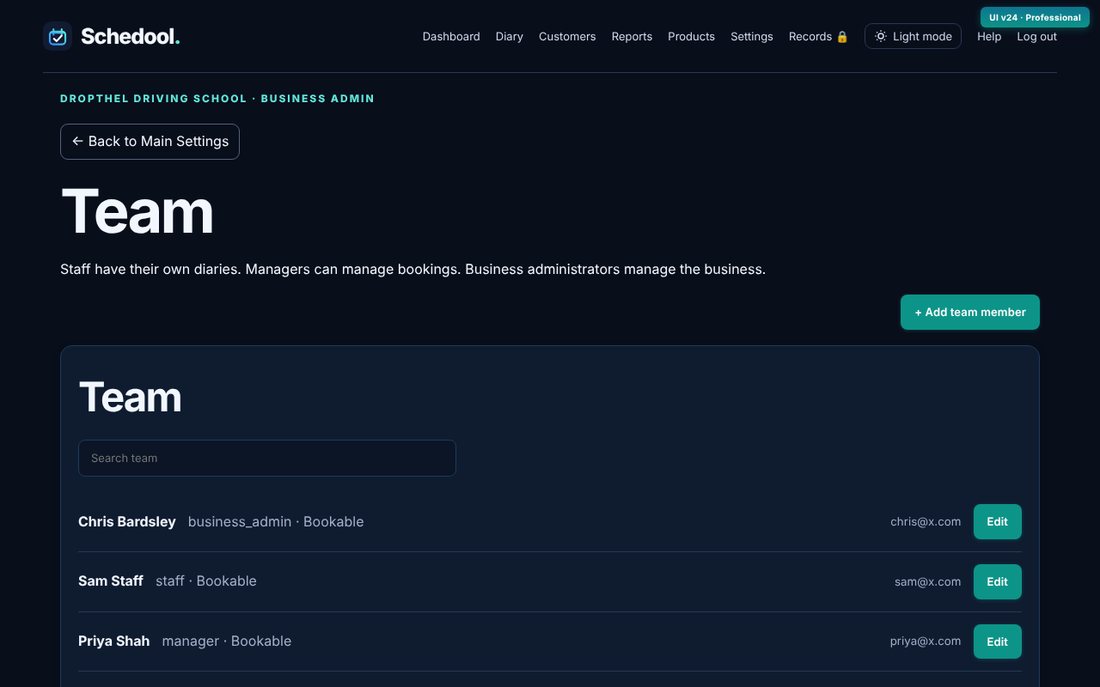
- Go to Settings → Team.
- Click Add member, enter their name and email, and choose a role (Staff, Manager or Admin).
- Tick Bookable if customers can book appointments with them.
- Save. Set their own hours in Settings → Working Hours if they’re different from the business.
💡 Plans include: Solo 1 bookable person, Team up to 5, Business up to 10.
💡 Staff see their own diary; managers can see and change everyone’s.
Control what staff can see and do
Use Settings → Staff & Permissions to choose what each person can see and do, or apply a quick preset.
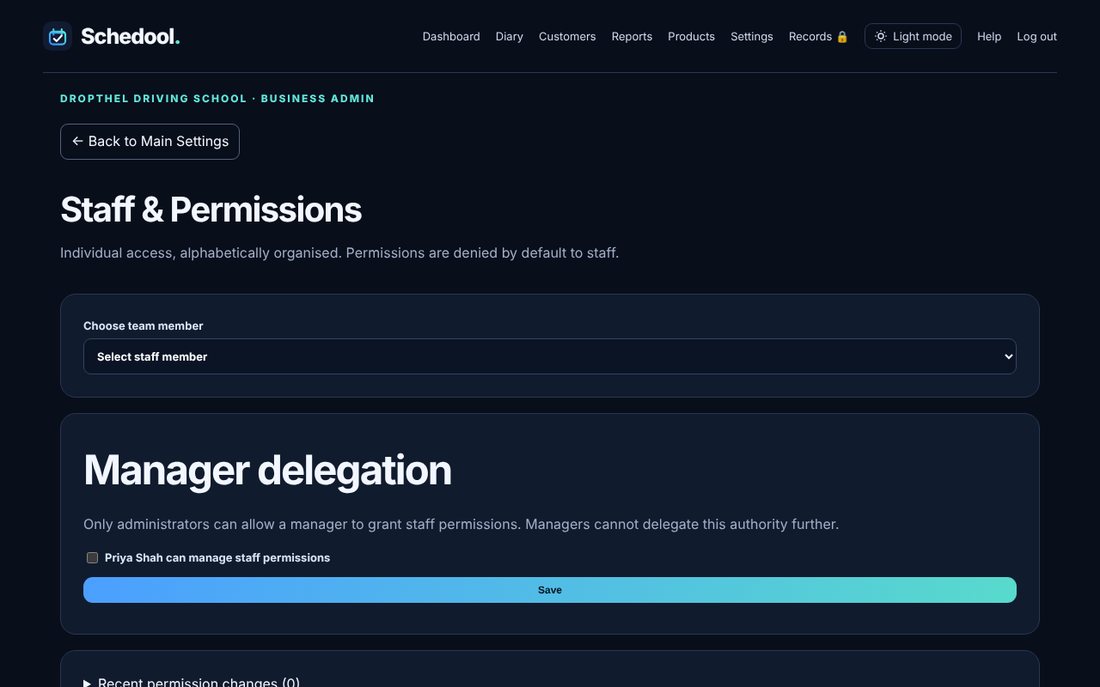
- Go to Settings → Staff & Permissions.
- Choose a team member.
- Apply a quick preset, or tick and untick individual permissions.
- Save. Changes are recorded in Activity History.
Set opening hours, breaks and holidays
Set business hours and each person’s hours in Settings → Working Hours, plus regular breaks and days off.
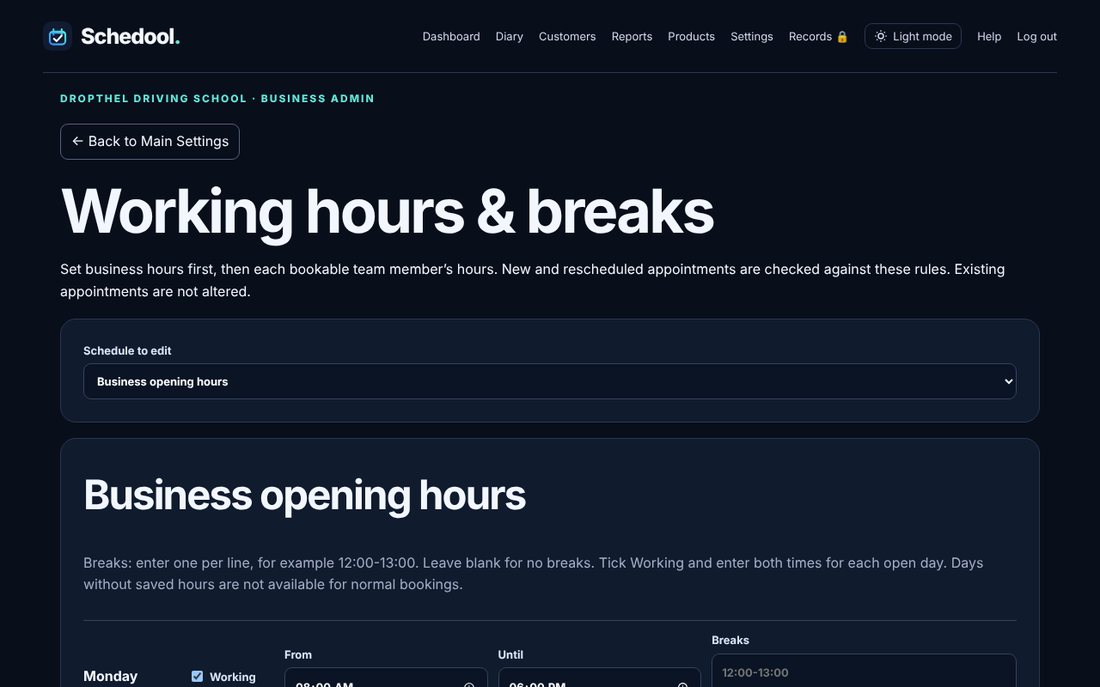
- Go to Settings → Working Hours.
- Under “Schedule to edit” choose the business or a team member.
- Tick the days you work, set start and end times, add regular breaks, and save.
- For holidays, use Days off & holidays: choose the first and last day and click Add holiday date range.
💡 Customers can only book online inside both the business hours and the team member’s hours.
Business details and logo
Change your business details and upload your logo in Settings → Business Profile.
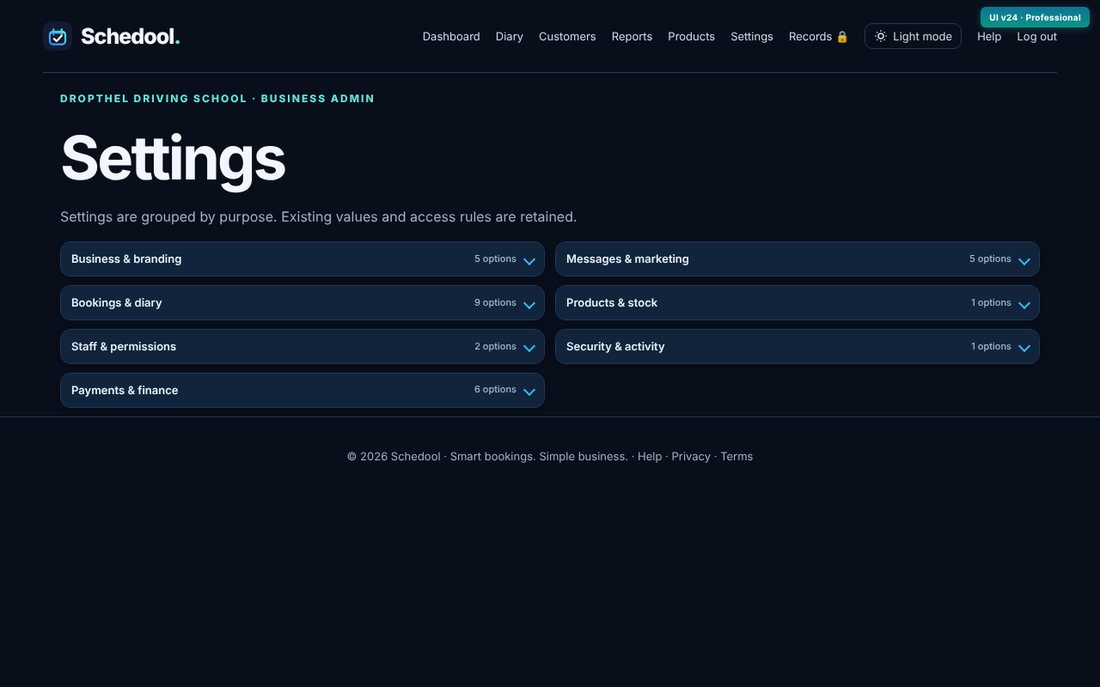
- Go to Settings and open Business Profile.
- Change your business name, industry and type.
- Under Business logo, choose a PNG, JPEG or WebP image (up to 2 MB) and upload it.
- Your logo appears on your booking page, emails and website widget.
Currency and time zone
Set your time zone and currency in Settings → International Settings.
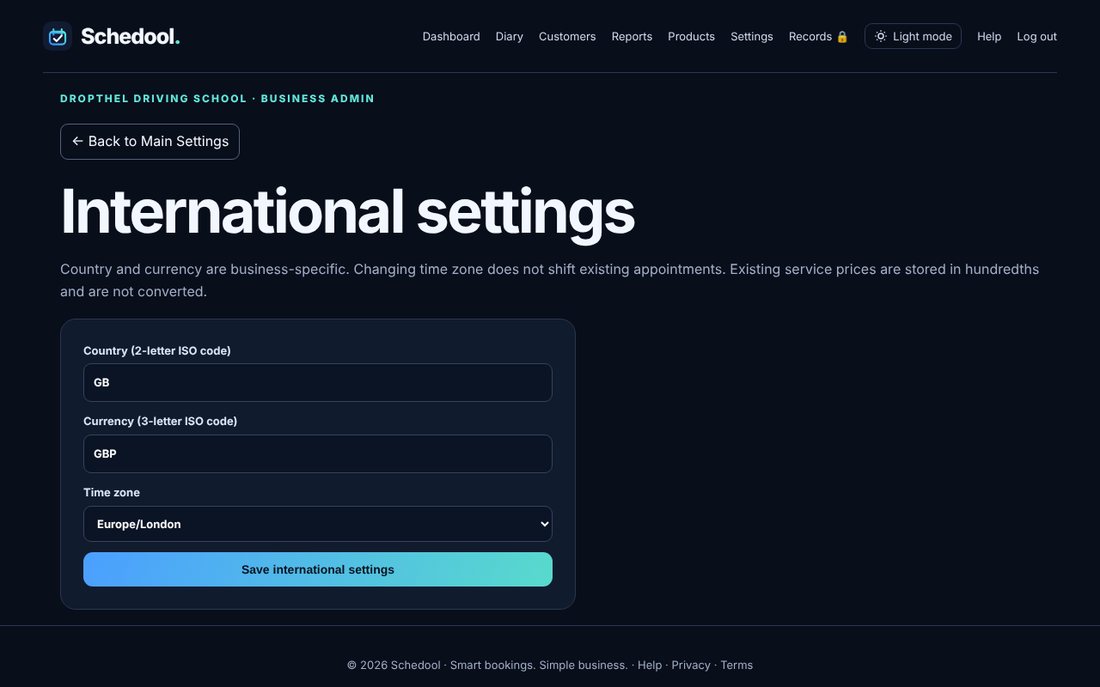
- Go to Settings → International Settings.
- Choose your time zone and currency.
- Click Save international settings.
💡 If appointment times look an hour out, the time zone is usually wrong.
Temporary hours – work different hours for a week or a few days
In Settings → Working Hours, add temporary hours for certain dates – for example working Saturday and Sunday for one week. They replace the usual hours on those dates only, then the usual hours apply again automatically.
- Open Settings → Working Hours and choose the team member (or Business opening hours).
- Scroll to Temporary hours and open + Add temporary hours.
- Choose the From and To dates.
- Set each day: tick Working and enter the start and finish (it starts as a copy of the usual hours). Untick days they’re off. Add an area if you use areas.
- Click Save temporary hours. You’ll be warned about any existing bookings outside the new hours – they’re never moved.
- To cancel them, click Remove next to the dates.
💡 On days with temporary hours, the team member’s hours apply even if the business is usually closed that day.
💡 Online booking, your mini site and the diary all follow temporary hours.
💡 Breaks from the usual week don’t apply on temporary days.
Areas – where you work each day
The easy way: make a service group for each area (e.g. Oldham Area, Warrington Area) and tick “This is an area I work in”. Then choose the area next to each day in Working Hours. Each group’s services are only offered on that area’s days.
- Go to Settings → Services → Service groups. Add a group for each area, tick the services in it, and tick “This is an area I work in”.
- Go to Settings → Working Hours. If you have your own hours, choose your name first.
- Under Areas, pick the area for each day from the list (e.g. Monday and Tuesday: Oldham Area, Wednesday: Warrington Area) and click Save areas.
- That’s it – on Oldham days customers only see the Oldham services, and on Warrington days only the Warrington ones.
💡 A day left on “Any area” offers every group’s services.
💡 Areas set for everyone apply to each team member unless they have their own area for that day.
💡 Temporary hours can have their own area for each day.
💡 You can still limit a single service to an area under “When can this be booked?” – that overrides its group.
Make a service bookable only at certain times (weekends, dates, areas)
Each service has “When can this be booked?”: any time, only on certain days, times or dates, or only during temporary hours – plus an optional area.
- Open Settings → Services and click Edit on the service.
- Under When can this be booked?, choose Availability: Any time the team member is working; Only on certain days, times or dates; or Only during temporary hours.
- For certain days/times/dates: tick the days (e.g. Sat and Sun), and add a time window or date range if you need one.
- Optional: type an Area – the service is then only bookable when the team member is working in that area.
- Save the service. The services list shows a 🕑 summary of the rule.
💡 Customers can only book online at the allowed times, and the team member must also be working.
💡 In the diary you can still book outside the rule – you’ll see a warning first.
💡 Passes have the same options (Settings → Prepaid Passes → click a pass) – a pass can then only be used for appointments that fit.
💳 Payments
Take payment for an appointment
Open the appointment and click Take payment. Take a card with Square, send a payment link, or record cash or a bank transfer.
- Click the appointment in the diary, then Take payment.
- You’ll see the price, what’s been paid and what’s due.
- Card now: choose Enter card now and type the card details (needs Square connected).
- Payment link: choose Send payment link, then email or text it. Click Check if paid later.
- Cash, bank transfer or your own card machine: use “Record a payment taken another way”.
- The diary badge changes to Paid (or Part paid) straight away.
💡 Don’t see the card option? Connect Square first in Settings → Card Payments.
What the Paid / Unpaid badges mean
Every appointment shows a payment badge: Paid, Part paid, Unpaid or No charge (free services).
- Paid – the full price has been paid (in the diary, online or with a pass).
- Part paid – a deposit or part has been paid.
- Unpaid – nothing has been paid yet.
- No charge – the service is free.
💡 The badge updates by itself when you take a payment or a customer pays online.
Connect Square to take card payments
Connect your own Square account in Settings → Card Payments. Money goes straight to you.
- Go to Settings → Card Payments (Square).
- Click Connect Square and sign in to Square (create a free account if you don’t have one).
- Click Allow. You come back to Schedool showing Connected.
- Choose your location, and what customers pay when booking online: nothing, a deposit, or the full price. Save.
💡 Square charges its own card fees. Any Schedool fee is shown on the page before you connect.
💡 You can disconnect at any time.
Check whether card payments are live
Settings → Payment connections shows, at a glance, whether card payments through Square are Live, in Test mode or not connected yet – and which payment methods you can always record.
- Go to Settings → Payments & sales → Payment connections (or Payments & Sales → Open Payment connections).
- Card payments (Square) shows Live – taking real payments, Test mode, Choose a location or Not connected.
- If it says Not connected, click Connect Square. If it says Choose a location, click Manage card payments and pick where payments go.
- Cash, bank transfer and customer credit can always be recorded in Payments & Sales.
💡 Square is the way to take card payments in Schedool today. PayPal, SumUp, GoCardless and the others aren’t available yet.
💡 Turned on a pretend test payment method in the past? Open Testing tools at the bottom of Payment connections to turn it off.
Take deposits when customers book online
In Settings → Card Payments choose a fixed deposit, a percentage, or the full price for all services. You can also set a different rule on any service. Customers pay on Square’s secure page after booking.
- Connect Square first.
- Under “Payment when customers book online” choose a fixed amount, a percentage, or the full price.
- Save. Online bookings now go to Square’s checkout, and the diary shows Part paid or Paid.
- Want a different rule for one service? See “Set a deposit or full payment for each service”.
💡 If a customer isn’t taken to Square to pay, their booking is still made and they’re asked to pay you at or before the appointment. Square’s reason is shown in red under Settings → Card Payments so you can fix it (often reconnecting Square sorts it).
Set a deposit or full payment for each service
Each service can have its own online payment rule: your usual setting, nothing online, a fixed deposit, a percentage deposit, or the full price.
- Make sure Square is connected (Settings → Card Payments).
- Go to Settings → Services and click Edit on the service (or add a new one).
- Under Payment when booking online, choose what customers pay: Your usual setting, Nothing online, A fixed deposit, A percentage deposit, or The full price.
- For a deposit, type the amount in pounds or the percentage.
- Save the service. The next online booking for it uses the new rule.
💡 “Your usual setting” follows Settings → Card Payments, so you only need to change the services that are different.
💡 Discount codes and gift vouchers come off the price first, then the deposit is worked out.
💡 If Square isn’t connected, customers book as normal and pay at the appointment.
Payments & Sales, receipts and reports
See every payment, print receipts and run reports in Payments & Sales. Owners can see the Finance Overview in Records.
- Open Payments & Sales.
- See statements and receipts. Click a transaction to print its receipt.
- Use the Transaction report filters to see a date range.
- Add your own payment methods under Custom payment methods.
💡 Records 🔒 holds the Finance Overview for people with finance access.
Prepaid passes and packages
Create passes (like 10 hours of appointments), sell them to customers, and Schedool takes time off their balance as they book.
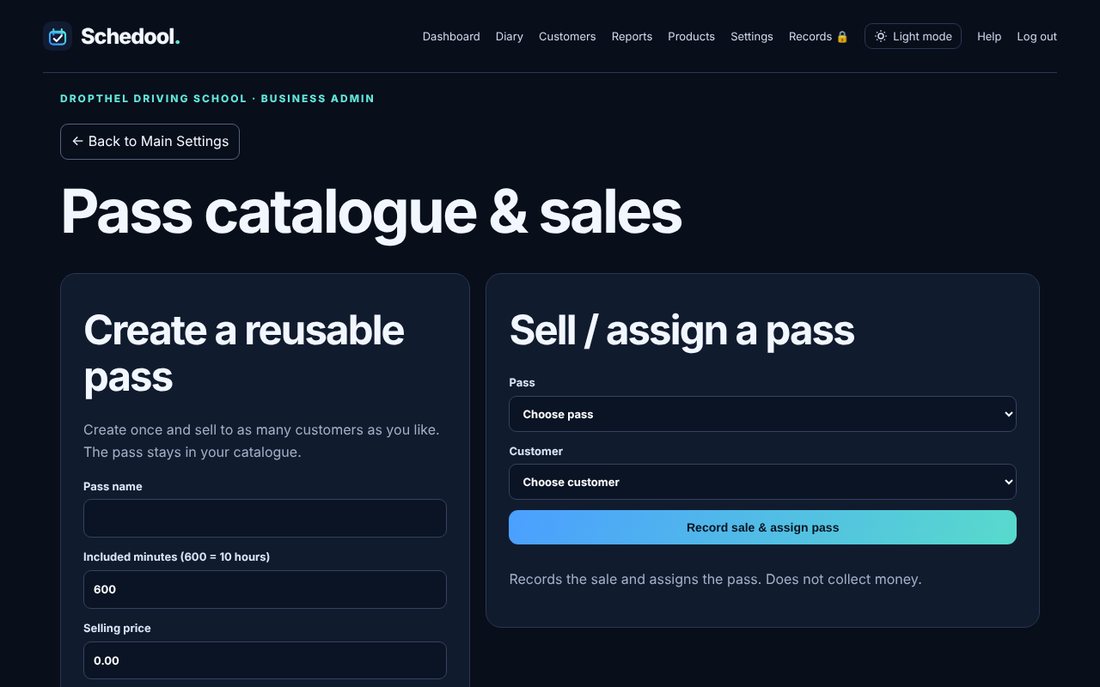
- Go to Settings → Prepaid Passes.
- Create a reusable pass: name, minutes or hours, price and expiry.
- Under Sell / assign a pass, choose the pass and customer and click Record sale & assign pass.
- When booking, choose to pay with the pass. The balance goes down by itself.
💡 Change how passes are used in Settings → Pass Settings.
Products and stock
Add products you sell, keep stock up to date and record sales in Products.
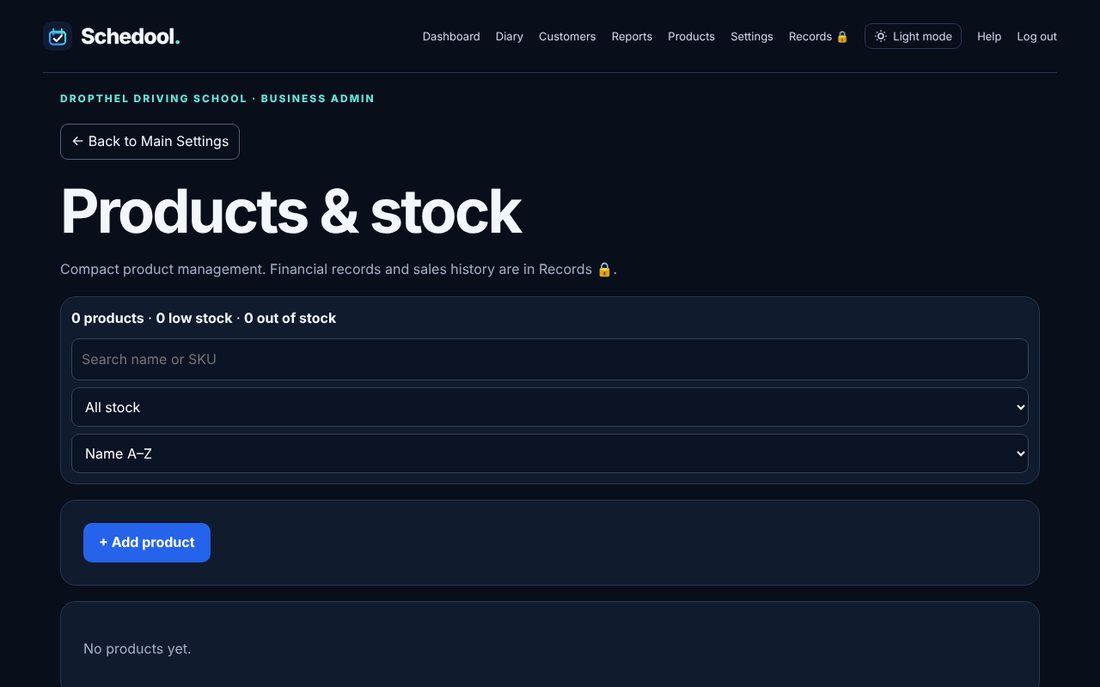
- Click Products in the menu (or Settings → Products & Stock).
- Add a product with its price and stock.
- Use Update stock when deliveries arrive.
- Use Record sale, optionally choosing the customer.
Sell prepaid passes online
Customers can buy your prepaid passes from your pass page, linked from your booking page, their account and the app. With Square connected they pay by card and the pass is added automatically.
- Create your passes in Settings → Prepaid Passes (name, hours, price and how long they last).
- Scroll to Sell passes online. Each pass is on sale unless you tap Stop selling online.
- Share your pass page link, or let customers find “Buy a pass” on your booking page and in the app.
- With Square connected, customers pay by card and the pass appears on their account as soon as the payment goes through.
- Without Square, orders appear under Online orders. When the customer pays you, tap Mark paid & add pass.
💡 Discount codes set to work on passes can be used on the pass page.
💡 If a card payment doesn’t show straight away, tap Check payment next to the order.
Edit a pass, sell it online or take it off sale
In Settings → Prepaid Passes, click any pass in the Pass catalogue to change its name, time, price, expiry and services, and to choose whether it’s sold online or available at all.
- Open Settings → Prepaid Passes.
- In the Pass catalogue, click the pass (or Edit).
- Change the name, included minutes, price, expiry or which services it can be used for.
- Tick or untick Sell online to put it on, or take it off, your pass page, booking page and website widget.
- Under What customers see when buying online, add an optional Description (shown under the pass name on your mini site and pass page), and tick or untick Show which appointments it can be used for.
- Untick Available to retire a pass – it disappears from sale, but customers keep any hours they’ve bought.
- Under When can this be used?, limit it to certain days, times, dates, temporary hours or an area if you need to – it can then only be used for appointments that fit.
- Click Save pass.
💡 Changes apply to future sales only – passes customers already have keep their hours and expiry.
💡 Free passes (price £0) can’t be sold online – give them out with Sell / assign a pass.
💡 A pass can only be deleted if it has never been sold.
Import your passes from another system
Upload a CSV file of your passes on Settings → Prepaid Passes → Import passes from a spreadsheet. You see a preview first, and passes you already have are skipped.
- Make a CSV file with the headings Name, Price and Minutes (or Hours). An Ovatu-style Info column such as “300 uses, 180 day expiry” works too, and so does an Expiry days column.
- Open Settings → Prepaid Passes and choose the file under Import passes from a spreadsheet.
- Click Check file and look at the preview – each pass shows its price, time and expiry.
- Leave “Put the paid passes on sale online” ticked if customers should be able to buy them, then click Import.
💡 Passes with “unlimited use” can’t be imported, because Schedool passes are a number of hours – add those yourself.
💡 Free passes are added to your catalogue for you to give out, but aren’t sold online.
💡 Imported passes can be used for all your services. Change that afterwards if you need to.
Redeem a gift voucher
Customers type the voucher code in the “Discount or voucher code” box when they book online. In the diary, add the voucher to the customer’s credit and use the credit to pay.
- Online: the customer types their code (for example GV-ABCD-EFGH) in Discount or voucher code when booking, on the website or in the app.
- The voucher comes off the price. Anything left on the voucher stays on it for next time; anything still owed is paid as normal.
- In person: open Settings → Gift Vouchers, find the voucher and choose Add to a customer’s credit…, then pick the customer.
- The voucher’s balance moves onto their account and you can use it like any other credit.
💡 Example: a £50 voucher on a £68 appointment leaves £18 to pay.
💡 A cancelled or expired voucher can’t be used. You can make a cancelled voucher usable again.
Customers paying for appointments online
When you’ve connected Square, customers see a Pay button on unpaid appointments in their account (on the website and in the app), and a Balance to pay box for appointments they’ve already had.
- Connect Square in Settings → Card Payments (Square).
- Customers sign in to their account (your booking page → Sign in, or your app).
- Appointments they’ve already had that aren’t paid show in a Balance to pay box with the amount and a Pay button. Upcoming unpaid appointments have their own Pay button, so they can pay in advance.
- Pay opens Square’s secure checkout. When they’ve paid, the appointment shows PAID in your diary and their account.
💡 Appointments marked No charge or Paid, or covered by a pass, never ask for payment.
💡 Without Square, customers still see what they owe, with a note to pay you directly.
💡 Part-paid appointments show only what’s left to pay.
Log mileage and expenses for your tax return
Log business journeys and costs as you go. Schedool totals them for the UK tax year (6 April to 5 April), estimates your mileage allowance at HMRC’s approved rates, and lets you download a spreadsheet for your accountant.
- Open Mileage on your dashboard (or Settings → Mileage & Expenses, or More → Mileage and expenses in the app).
- To log a journey, enter the date, the miles and what it was for, then Add journey.
- To log a cost, enter the date, amount and type, then Add expense.
- Choose a tax year at the top to see its totals.
- Click Download spreadsheet to send everything to your accountant.
💡 The allowance uses HMRC’s rates for cars and vans: 55p a mile for the first 10,000 business miles in 2026/27 (45p before 6 April 2026), then 25p.
💡 If you claim mileage, you normally can’t also claim fuel, insurance or repairs for the same car – ask your accountant.
💡 Everyone in the team keeps their own log; managers can view anyone’s.
💡 In the app you can log a journey with no signal; it’s sent when you’re back online.
🌐 Online booking & your website
Your online booking page
Every business gets a booking page where customers pick a service, team member and time. Share the link anywhere.
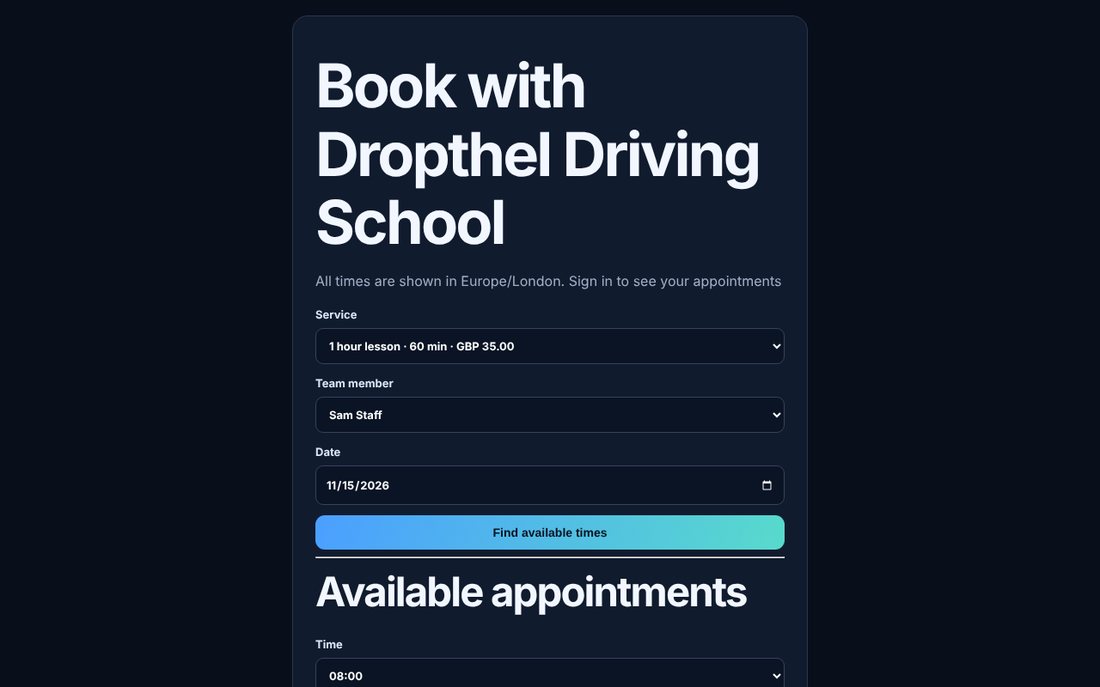
- Go to Settings → Website Booking Widget and choose Just a link (or open Online booking & forms).
- Copy the link and share it on Facebook, Instagram, Google, your email signature or by text.
- Customers choose a service, team member and date, pick a time and enter their details.
- The booking appears in your diary straight away.
💡 Only services set to online and in-house can be booked online.
💡 Times follow your working hours, breaks and existing bookings.
💡 If the time a customer wants has just gone, the page shows the nearest free times that day as buttons. If a day is full, it shows the next free times on the following days.
Add your own fields to the booking form
In Settings → Website Booking Widget, under “Extra fields on your booking form”, click + Add a field for each question you want to ask, choose Optional or Compulsory, then click Save fields.
- Go to Settings → Website Booking Widget and scroll to “Extra fields on your booking form”.
- Click + Add a field. A new row appears.
- Type your question, e.g. “Any allergies?” or “Car registration”.
- Choose Optional or Compulsory. Compulsory means customers can’t book without answering.
- Click + Add a field again for each extra question. Add as many as you like.
- To remove a question, click ✕ on its row.
- Click Save fields. The questions appear on your booking page, mini site and the customer app straight away, in the order shown.
💡 Answers are saved with the appointment. Open it in the diary or the app to see them.
💡 Removing a question keeps the answers customers have already given.
💡 The built-in mobile number and address fields can be renamed, made optional or switched off in section 4 above.
Welcome email: set a password and get the app (edit or resend it)
After a new customer’s first online booking, Schedool emails them a link to choose a password and the steps to add your app to their phone. Change the wording in Settings → Website Booking Widget → Edit the welcome email. To send it again, open the customer and click Resend welcome email.
- To change the wording, go to Settings → Website Booking Widget. In section 4, open “Edit the welcome email”.
- Change the subject and your message. You can use [first_name], [name] and [business_name].
- The Choose my password button and the iPhone and Android app steps are always added under your message.
- Click “Save and send me a test” to see it in your own inbox, or Save widget to just save.
- To resend it, open the customer in Customers. Under Online account, click Send welcome email or Resend welcome email. It contains a fresh password link that lasts 7 days.
- If they’ve already chosen a password, the email has a Sign in button instead of a password link.
💡 It’s sent automatically only once per customer, and never to anyone who already has an account.
💡 To stop the automatic email, untick “After their first booking, email new customers an invite…” in section 4 and save. You can still send it by hand from a customer’s record.
💡 To go back to the standard wording, clear the subject and message and save.
Group your services on your booking page (for example by area)
In Settings → Services, add Service groups such as “Oldham Area” and “Warrington Area”, each with a short description and a picture, and tick the services in each. Your mini site, booking page and the customer app then show the services under those groups.
- Go to Settings → Services and scroll to Service groups.
- Click + Add a group. Give it a name (e.g. Oldham Area), a short description (e.g. All areas in and around Oldham) and, if you like, a picture such as a map of the area.
- Tick the services that belong in the group and click Add group.
- Repeat for each group. Use the ↑ ↓ buttons to change the order they appear in.
- Want the same lessons in two groups, maybe at different prices? Open the group, use “+ Copy lessons into this group”, tick the lessons you want, set each price for this group and click Copy ticked lessons. Each becomes a separate copy, so each group has its own price.
💡 On the mini site each group is a card customers tap to open. On the booking page the services appear under group headings.
💡 Each service is in one group. Ticking it in another group moves it – use “Copy lessons into this group” to have it in both.
💡 Copies are named with the group in brackets, e.g. “1 hour lesson (Warrington Area)”, so you can tell them apart in your diary. Customers just see “1 hour lesson” under the Warrington heading.
💡 Services without a group show under “Other services”.
💡 Work in different areas on different days? Tick “This is an area I work in” on the group, then pick the area next to each day in Settings → Working Hours. See “Areas – where you work each day”.
💡 Removing a group doesn’t remove its services – they just show without a group.
Choose what customers must tell you when they book
In Settings → Website Booking Widget, section 4, choose whether the mobile number and address are required, optional or not asked. It applies to your booking link, mini site, Book now button and the customer app.
- Go to Settings → Website Booking Widget.
- Under “4. What customers must tell you when booking”, set Mobile number to Required or Optional.
- Set the address to Required, Optional or Don’t ask. Driving schools see this as Pickup address.
- Click Save widget. It applies straight away everywhere customers book online.
💡 Name and email are always needed.
💡 By default the mobile number is required, and driving schools are asked for a pickup address.
💡 The address is saved on the appointment (you’ll see it as the pickup in the diary) and on the customer’s record if it was empty – it never overwrites details you’ve already got.
💡 In the customer app, people are only asked if it isn’t already on their record.
Add a Book now button to your website
Copy a small piece of code from Settings → Website Booking Widget and paste it into your website. Change colours to match.
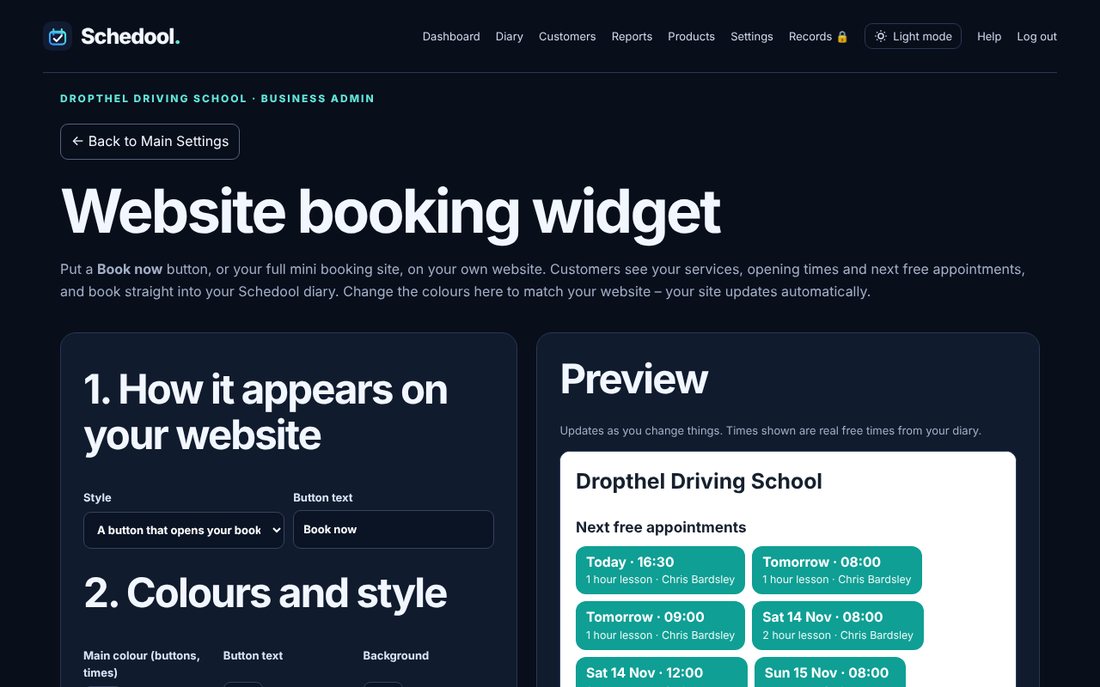
- Go to Settings → Website Booking Widget.
- Choose a Book now button or the mini booking site shown in the page.
- Add Your website address if you have one – your logo and business name on the mini site then take customers back to your website.
- Pick your colours, font and what to show (services, opening times, next free times). Customers tap a service to open it and see its next free times. Watch the preview and click Save widget.
- Under “Add it to your website”, click Copy.
- In your website builder, add an Embed / HTML / Custom code block and paste the code.
💡 You only paste the code once – saved changes appear on your site automatically (except the button colour and text, which are part of the button code).
💡 Not showing? Make sure you used an HTML or embed block, not a text block.
💡 The free times shown are refreshed every few minutes in the background, so the mini site opens quickly. If someone picks a time that’s just gone, the booking page offers the nearest free ones.
Consultation forms
Create forms with your own questions, link them to services, and send secure links for customers to fill in.
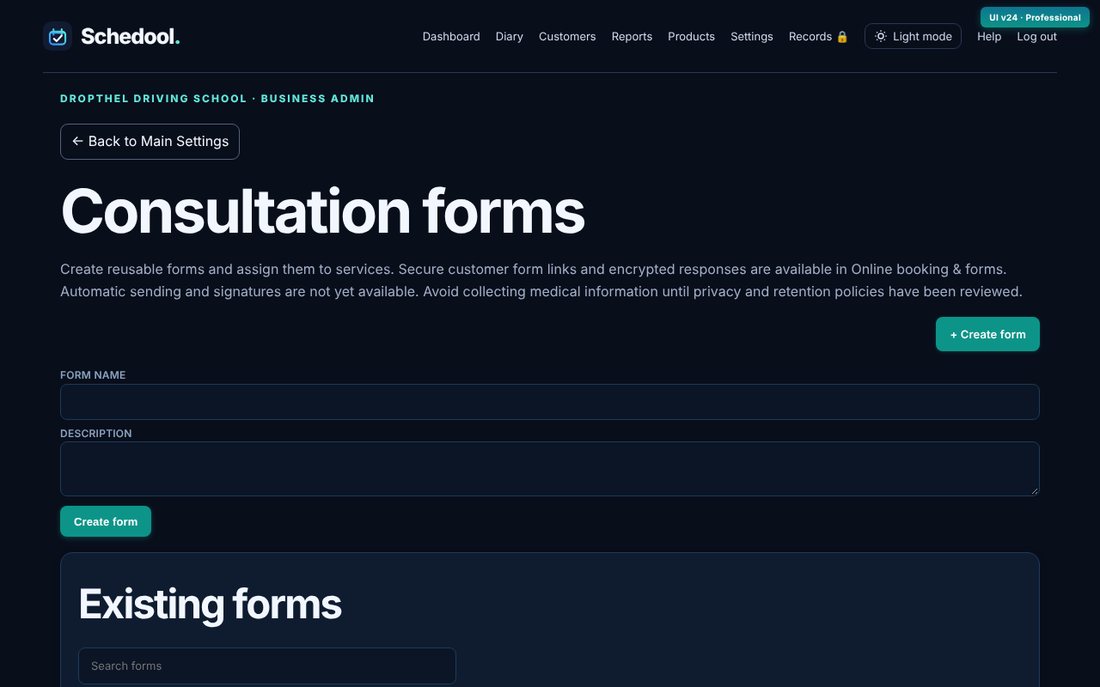
- Go to Settings → Consultation Forms and create a form.
- Add questions and choose the answer type for each.
- Under Service assignments, attach the form to services.
- To send one, open the customer, choose the form template and click Generate form link.
- See answers in Online booking & forms → Form submissions.
💡 Answers are stored encrypted.
Buy a pass, Reviews and Gift vouchers on your mini site
Your mini booking site has tabs: Book (shown as “Book a lesson” for driving schools, tutors and coaches, or “Book an appointment”), Buy a pass (if you sell passes online), Reviews and Gift vouchers (if switched on).
- Book: customers tap a service to see its next free times.
- Buy a pass: lists the passes you sell online – customers tap Buy to pay by card. Each pass can show a description and, if you choose, which appointments it covers (set these when you edit the pass in Settings → Prepaid Passes).
- Reviews: your average rating, approved reviews and a Leave a review button.
- Gift vouchers: shown when you sell gift vouchers (Settings → Gift Vouchers).
- Turn any of these tabs on or off in Settings → Website Booking Widget.
💡 A tab only appears when there’s something in it – for example, Buy a pass needs at least one pass set to sell online.
Let customers change or cancel their appointments
In Settings → Booking Rules & Terms, choose whether customers can cancel, or change and cancel, their own appointments, and how much notice they must give.
- Open Settings → Booking Rules & Terms.
- Choose No, They can cancel, or They can change the time or cancel.
- Pick how much notice they must give – inside that time the buttons disappear and customers are asked to contact you.
- Tap Save booking rules.
- Customers see Change and Cancel next to upcoming appointments in their account and in the app. You’re notified, and a freed-up time is offered to your waiting list.
💡 Payments and deposits aren’t refunded automatically – handle refunds as your terms say.
Add your own terms and conditions
Write your terms in Settings → Booking Rules & Terms. They’re linked from your booking page, website widget, pass shop, waiting list and app – and you can make customers tick to agree.
- Open Settings → Booking Rules & Terms.
- Type or paste your terms into Your terms. Leave a blank line between paragraphs; start a line with “- ” for a bullet point; a short line on its own becomes a heading.
- Tick Customers must tick to agree if they should agree before booking or buying.
- Tap Save booking rules, then open Your terms page to check how it looks.
💡 If you don’t tick the box, customers see “By booking you agree to our terms and conditions” with a link instead.
Your privacy information for customers
The “privacy information” link on your booking form, waiting list and pass pages opens a privacy page for your business. Unless you write your own, it shows a standard notice. To write your own, go to Booking rules & terms.
- Customers see “See the business privacy information” next to the tick box when they book. It’s a link that opens in a new tab, so they don’t lose their booking.
- If you haven’t written your own, the page shows a standard notice for your business. It explains what you collect, why, who can see it, how long you keep it and how customers can ask for a copy, a correction or deletion.
- To use your own wording, go to Settings → Booking rules & terms, then Your privacy information.
- Type or paste your notice. Use blank lines between paragraphs and start lines with - for bullet points.
- Click Save booking rules. Clear the box to go back to the standard notice.
💡 If you’ve set your own sending email in Email settings, the page shows it as the contact address. Otherwise customers are told to reply to any email from you.
💡 The standard notice is a general starting point, not legal advice. Check it suits your business.
✉️ Emails, texts & reminders
Set up your email (so messages send)
Connect your business mailbox in Settings → Email Configuration, so confirmations and reminders come from your address.
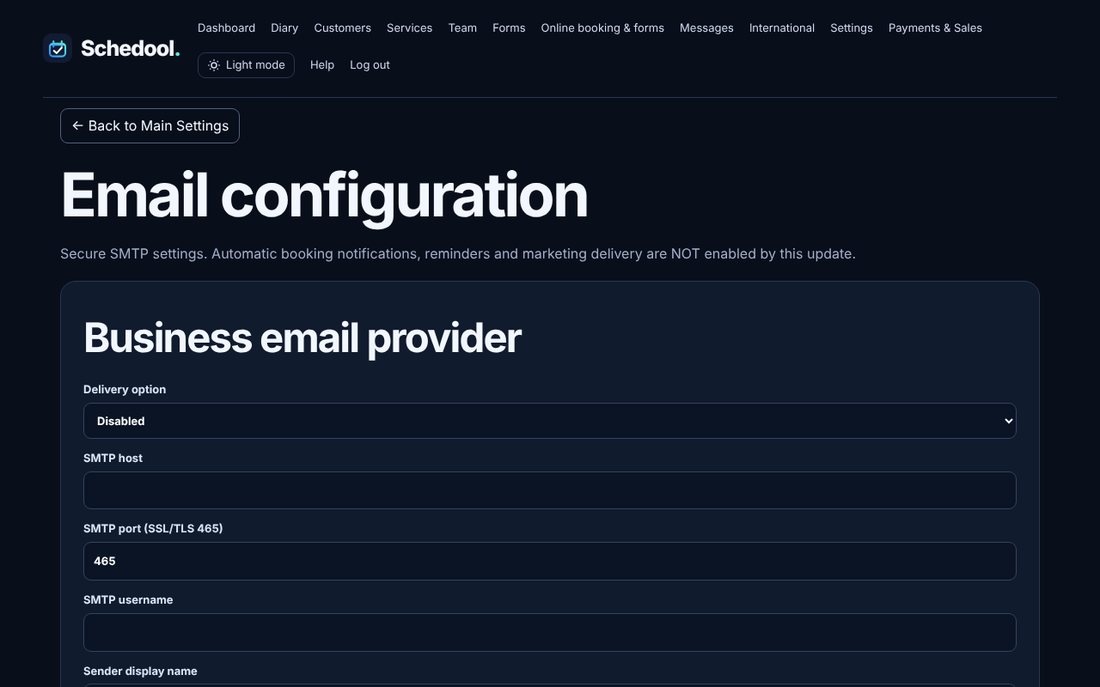
- Go to Settings → Email Configuration.
- Choose “Use own verified SMTP mailbox”.
- Enter your mail server (for example mail.yourdomain.co.uk), port 465, your full email address as the username, and its password.
- Save, then send a test email to yourself.
💡 Error 535 means the email or password is wrong – check you can sign in to webmail with them.
💡 If you don’t set one up, Schedool’s shared mailbox is used.
Booking confirmation and reminder emails
Schedool can email customers when they book and before appointments. For text messages, see “Send text reminders”.
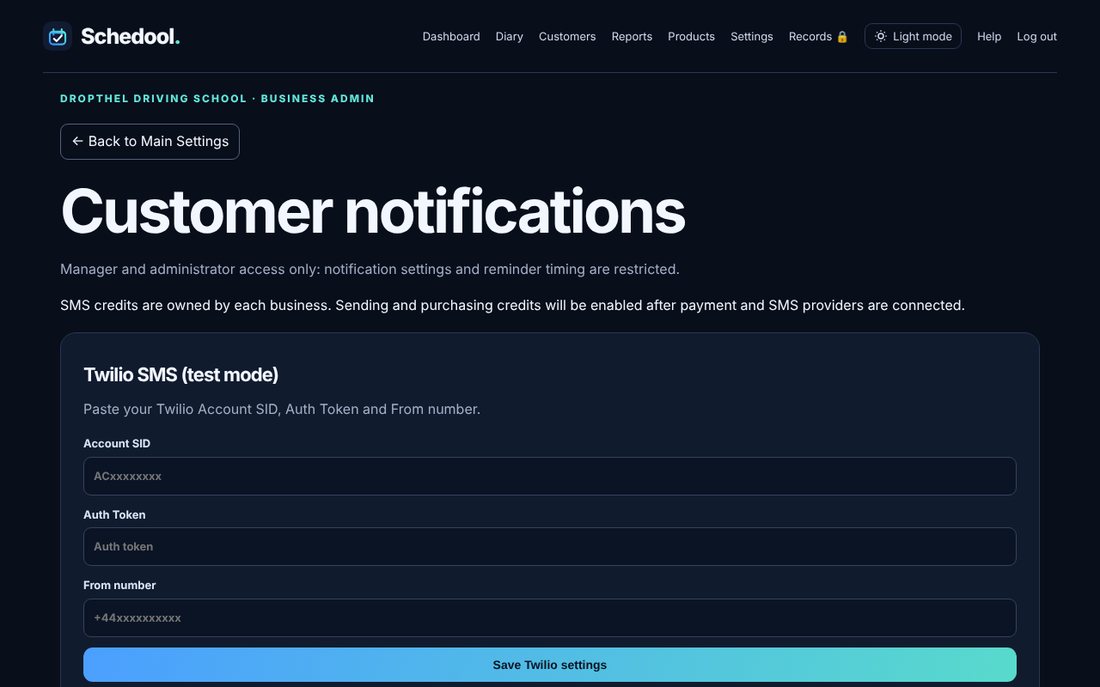
- Go to Settings → Notifications & Reminders.
- Choose which emails to send and when reminders go out.
- See what’s been sent in Notification history.
- For texts as well as emails, go to Settings → Text Messages.
💡 Change the wording in Settings → Message Templates.
Send text reminders and booking texts
Send customers a text reminder before their appointment, plus texts when they book or when it changes. Texts use credits, which you buy in Settings → Text Messages.
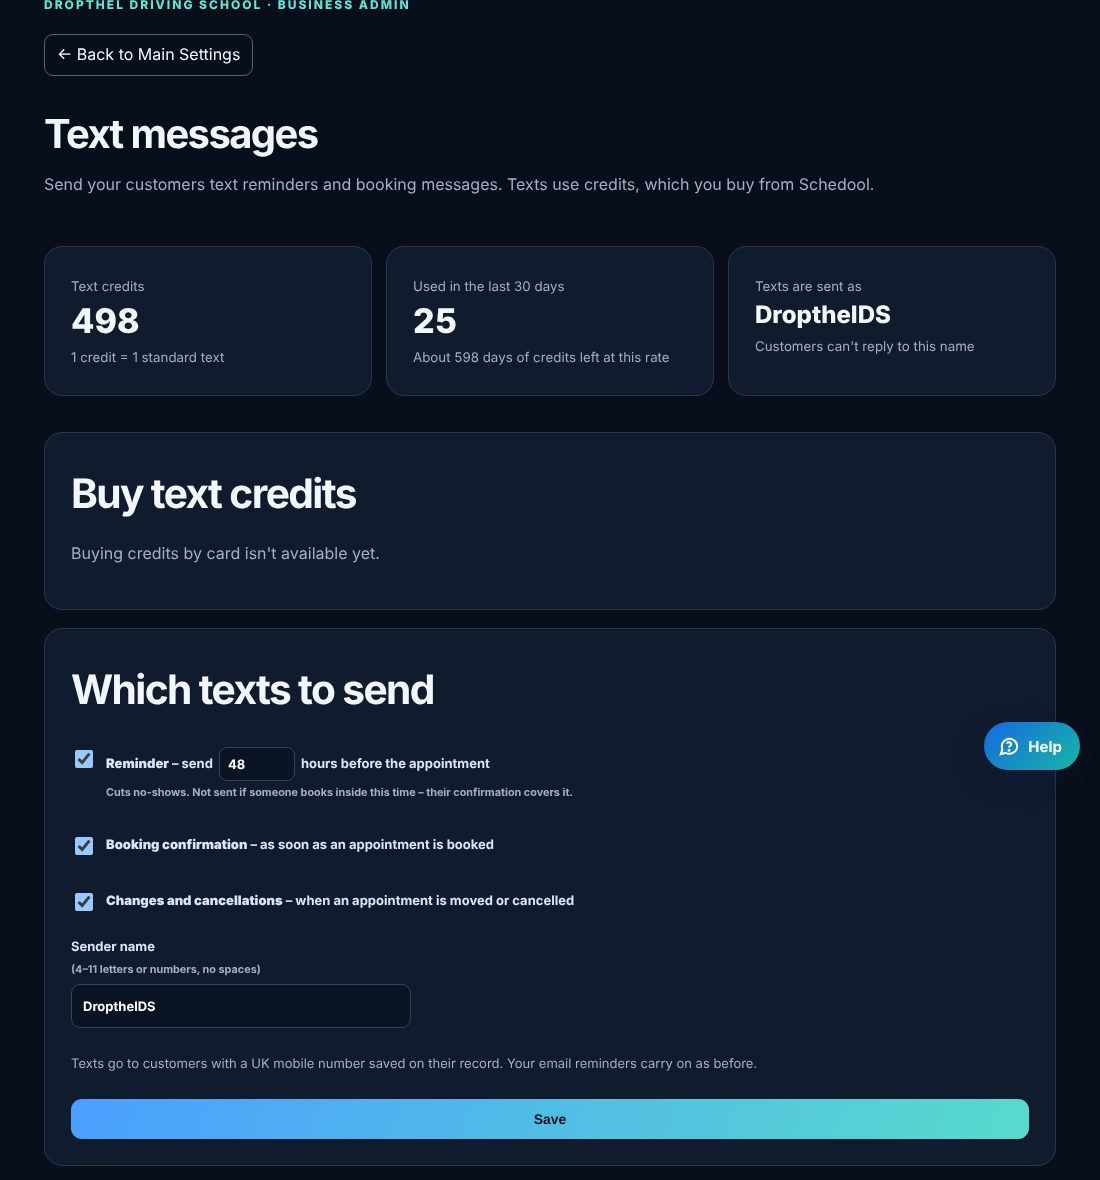
- Go to Settings → Text Messages (SMS).
- Under Buy text credits, choose a pack and pay by card. Credits are added straight away and don’t expire. 1 credit = 1 standard text.
- Under Which texts to send, tick Reminder (and choose how many hours before), Booking confirmation, and Changes and cancellations. Save.
- Check the sender name – it’s what customers see the text is from. It must be 4 to 11 letters or numbers with no spaces, for example DropthelDS.
- Use “Send this to your phone” to see a test text for yourself.
- Recent texts shows every text: sent, skipped (and why), or waiting for credits.
💡 Texts go to customers with a UK mobile number on their record. Your email reminders carry on as well.
💡 If you run out of credits, texts wait and go out as soon as you top up (reminders until the appointment starts). You get an email when credits run low.
💡 Customers can’t reply to the sender name. Add your phone number in Settings → Business Details and it’s included so they can call you.
💡 If a customer asks you to stop texting them, add them under “Customers who don’t want texts”.
💡 To change the wording, add an SMS template in Settings → Message Templates.
Change the wording of messages
Write your own wording for the automatic emails and texts – booking confirmations, reminders, changes and cancellations – in Settings → Message Templates. Insert fields like the customer’s name and appointment time.
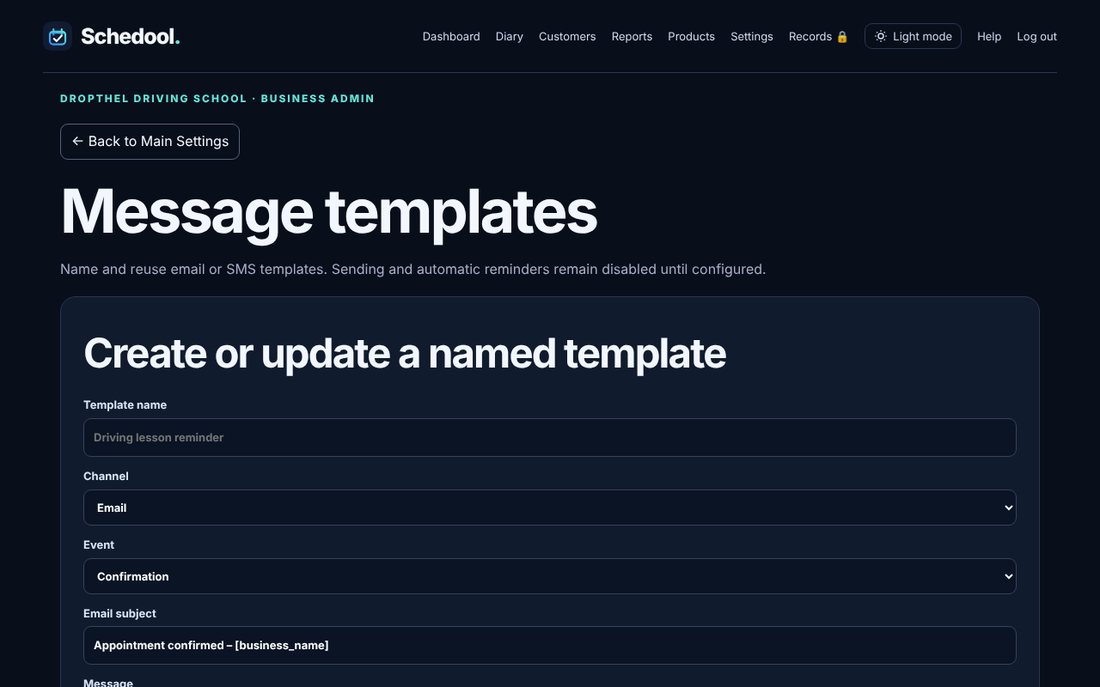
- Go to Settings → Message Templates.
- Give the template a name, then choose the channel (email or text) and the message, for example Reminder.
- Write your message. Use Insert personalisation to add fields like first name, date and time.
- Leave “Use this template for this message” ticked, then click Save template. From then on, that message uses your wording.
- To go back to Schedool’s standard wording, untick “Use this template” and save, or delete the template.
💡 One template is in use for each message – it’s marked “In use” in the list. Switching on a new one switches off the old one.
💡 Use Restore default message to start from the standard wording.
💡 The no-show email and review requests have their own editors in Settings → Notifications & Reminders and Settings → Reviews.
Marketing campaigns
Create campaign drafts in Settings → Marketing, for example to customers who haven’t booked recently.
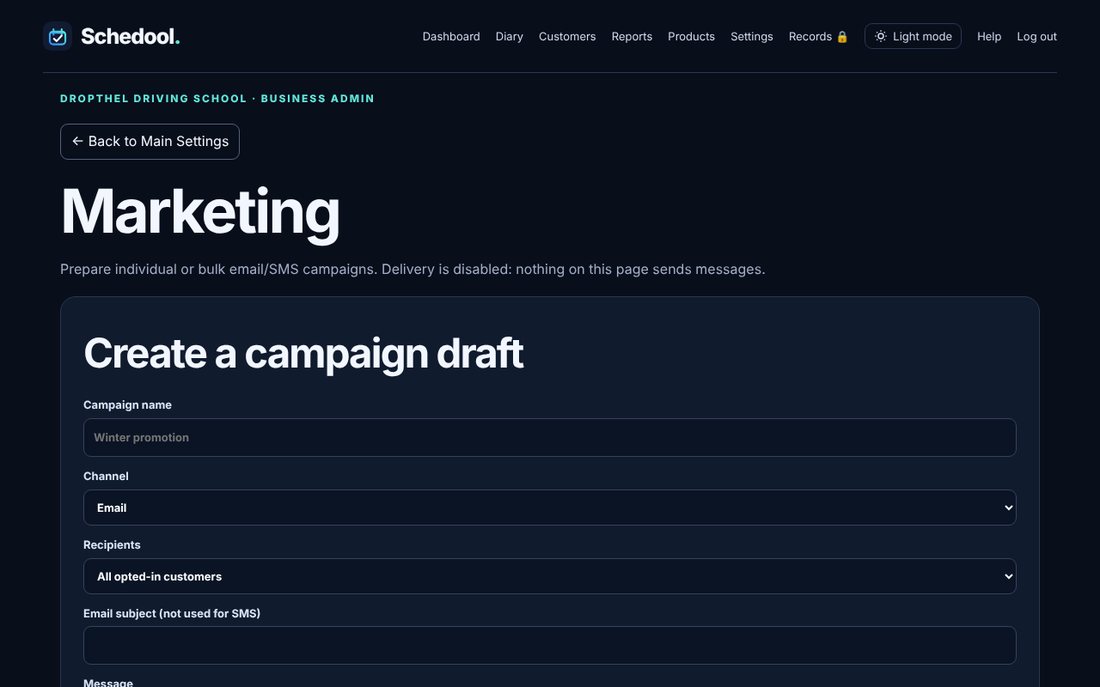
- Go to Settings → Marketing.
- Create a campaign draft: choose the channel and recipients (for example “not booked in the last 60 days”).
- Write the message and save the draft.
- Check the recipient preview and delivery status.
Turn on automatic reminders
Reminder emails, text messages, app reminders, review requests and calendar updates are sent by a scheduled task that runs every 5 minutes. It’s set up once in your hosting control panel.
- Sign in to cPanel and open Cron Jobs.
- Choose “Once Per Five Minutes”.
- For the command, enter: /usr/local/bin/php /home/YOUR-CPANEL-USER/public_html/live-schedool.net/schedool-notification-worker.php (replace YOUR-CPANEL-USER with your cPanel username).
- Tap Add New Cron Job.
- After a few minutes, Settings → Get the App stops showing the “hasn’t run in the last hour” message.
💡 If your host uses a different PHP path, cPanel shows it under Cron Jobs or in Select PHP Version.
Messages from customers in the app
Customers can send you a message from the Schedool app – about a particular appointment or in general. You reply from the Messages tab in the staff app or from Messages on the website, and the customer gets a notification (or an email if they haven’t turned notifications on).
- When a customer messages you, you get a notification on your phone and an unread number appears on Messages (in the app and on the website).
- Open Messages and tap the customer to see the whole conversation. If the message is about an appointment, it shows which one.
- Type your reply and tap Send in the app – the customer is notified straight away. Or tap Text from my phone to send it as a normal text from your own phone (a copy is kept in the conversation, marked “Sent by text”).
- To message a customer yourself, open the customer and tap Send a message (on the website: Message). Choose Message in the app, or Text from my phone.
💡 Who sees what: a message about an appointment goes to the staff member doing it and to managers. General messages go to managers and admins. Staff only see customers they have appointments with.
💡 If nobody has read a message after an hour, managers also get an email so nothing is missed.
💡 Customers can only send a message if they’ve signed in to your app, so you always know who it’s from. If a customer hasn’t signed in to your app yet, use Text from my phone instead.
💡 Text from my phone opens your phone’s own Messages app, so the text comes from your number and their reply goes to your phone, not to Schedool.
Message hours and away dates (holidays)
Set the hours you take messages and add away dates for holidays. Outside those times customers can still send a message, get your closed reply (with when you’re back), and your team isn’t alerted until messages open again.
- Open Settings → Messages from Customers.
- Under Message hours choose Any time, Our opening hours, or Set my own message hours (tick the days and set the times).
- Under Away dates, add the first and last day of a holiday and an optional note for customers, e.g. “Closed for Christmas – back 2 January”.
- Write a closed reply if you like – Schedool adds when messages open again.
- Click Save. “Right now” shows whether messages are open.
💡 When messages open again, everyone who would have been alerted gets one notification: “3 new messages while you were away”. This needs the cron job running.
💡 Customers see a note at the top of Messages while you’re closed, so they know when to expect a reply.
💡 Past away dates tidy themselves away when you next save.
Turn customer messages off, or set an automatic reply
Settings → Messages from Customers lets you switch customer messages on or off and set an automatic reply, for example “Thanks – we reply within one working day.”
- Open Settings and choose Messages from Customers.
- Untick Let customers message you in the app to switch it off – customers will see a note asking them to call or email instead.
- Type an automatic reply if you’d like one, or leave it blank for none.
- Click Save.
💡 The automatic reply is sent at most once every 12 hours to each customer, so it doesn’t repeat on every message.
💡 Turning messages off keeps old conversations – you can still read them in Messages.
Get a morning summary of your day
Each morning at a time you choose, Schedool sends you your day: your appointments, the first pickup with a directions link, money still owed, unread messages and tests coming up.
- Open Settings → Morning Summary (or in the app, More → Morning summary).
- Tick Send me a morning summary and choose a time, for example 07:00.
- Choose an app notification, email, or both.
- Leave “Don’t send it on days with nothing on” ticked if you only want it on working days. Save.
- Use Send me today’s summary now to see what it looks like.
💡 Each person in your team sets their own.
💡 For notifications, turn them on in the app first (More → Notifications).
💡 Money still owed looks back 30 days and leaves out appointments covered by a pass.
💡 It’s sent by Schedool’s scheduled task – see “Turn on automatic reminders”.
Send an email automatically when someone doesn’t turn up
When you or your staff mark an appointment as a No-show – in the diary or in the app – Schedool can email the customer straight away. You choose the wording, and it can include a button to book a new time.
- Open Settings → Notifications & Reminders and scroll to No-show email.
- Tick Send the no-show email automatically.
- Change the subject and message if you like. Use Insert personalisation to add the customer’s name, the service, the date and time, the staff name or your phone number.
- Leave “Add a Book a new time button” ticked to link to your booking page.
- Click Save no-show email, then Send me a test email to see what customers get.
💡 To mark a no-show, open the appointment and set its status to No-show (or tap No-show in the app).
💡 It’s sent once per appointment – marking it again won’t send a second email.
💡 It’s never sent for an appointment that hasn’t started yet, so an accidental tap on a future appointment won’t email anyone.
💡 Restore standard wording puts the original subject and message back.
💡 The customer needs an email address, and your email settings must be working (Settings → Email Configuration).
🔄 Calendars, import & export
Show Google, Outlook or Apple calendars in your diary
Paste your calendar’s secret address in Settings → Calendar Import. Those events show in your diary and block online bookings.
- Get your calendar’s private address: Google – Settings → your calendar → “Secret address in iCal format”; Outlook – Settings → Calendar → Shared calendars → Publish → ICS link; Apple – Calendar app → share calendar → Public Calendar → copy link.
- Go to Settings → Calendar Import and paste the link.
- Choose the team member it belongs to and save.
- Events appear in the diary and those times can’t be booked online. They refresh automatically.
💡 This only reads your calendar – Schedool never changes it.
Export your diary or import from another system
In Settings → Import & Export: a live calendar link for your phone, an .ics download, a spreadsheet export, and spreadsheet import.
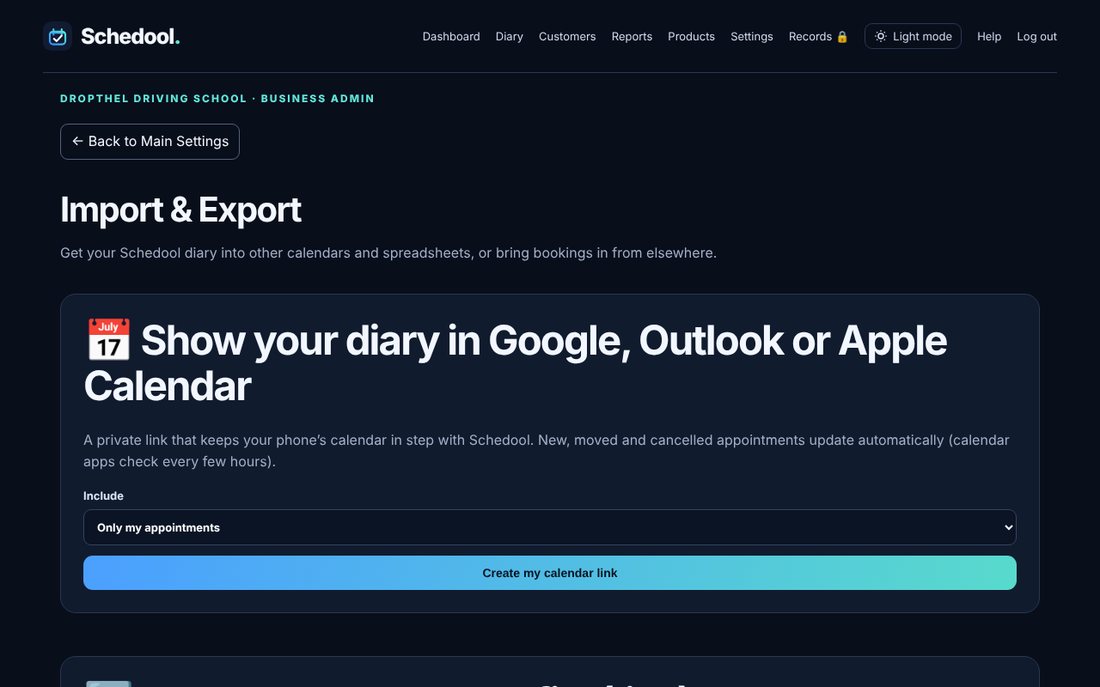
- Go to Settings → Import & Export.
- Live calendar link: create it and add it to your phone or Google calendar – your Schedool diary stays up to date there.
- .ics download: a one-off file for calendar apps.
- CSV export: a spreadsheet of appointments for a date range.
- CSV import: upload a spreadsheet from another system, check the preview, then import.
💡 Keep your live calendar link private – anyone with it can see your appointments. You can reset it any time.
💡 Moving from Ovatu? Import your customers first (Customers → Import customers), then your appointments export as it comes – cancelled bookings are skipped, no-shows are kept, and ones already paid can be shown as paid.
Bring your appointments over from Ovatu or another system
Export your appointments from your old system as a CSV file and upload it under Settings → Import & Export → Import appointments. Ovatu’s export works as it is.
- Import your customers first (Customers → Import customers), so appointments link to the right people.
- In your old system, export your appointments (in Ovatu: Reservations → Export) as a CSV file.
- In Schedool, go to Settings → Import & Export and choose the file under Import appointments from a spreadsheet. Leave “Create services that don’t exist yet” ticked.
- Click Check file. The preview shows what will be added, and what’s skipped – cancelled or deleted bookings, and anything already in your diary.
- Tick “Show appointments already paid as paid” if you want them marked paid, then click Import.
💡 No confirmation emails or texts are sent.
💡 New services are created as staff-only, with the price from your file – check them in Settings → Services and make them bookable online when you’re ready.
💡 Notes and extra columns like a pick-up address are added to each appointment’s notes.
💡 You can upload the same file again safely – appointments already in the diary are skipped.
⚙️ Your account & plan
See how many people visit the Schedool website (Schedool HQ)
Schedool HQ → Settings → Website visitors shows visits to schedool.net, where people came from, which pages they read and how many started a free trial. It doesn’t use cookies.
- Open Schedool HQ, then Settings → Website visitors.
- Pick Today, 7 days, 30 days, 90 days or 12 months.
- See visitors, pages viewed, free trials started, where visitors came from and which sources led to trials.
- To track a particular post or flyer, add a tag to the link, for example https://schedool.net/?utm_source=facebook&utm_campaign=adi-group.
💡 Your own visits aren’t counted while you’re signed in. To check it’s working, open the website in a private window.
💡 Visitors can choose not to be counted on the privacy page, and browsers sending Global Privacy Control or Do Not Track aren’t counted.
“Too many wrong attempts” when signing in
After 8 wrong passwords (or 8 wrong two-step codes) in 15 minutes, Schedool pauses sign-in for that account for 15 minutes. This protects you and your customers from people guessing passwords. Wait, or reset the password.
- Wait 15 minutes, then sign in again with the right password.
- If you’ve forgotten it, use “Forgot your password?” to get a reset link by email. Then sign in with the new password once the 15 minutes are up.
- Customers locked out of their account or the app can do the same. You can also open the customer and click Resend welcome email, or Send a link to reset their password.
💡 The pause is per account, so other people at your business can still sign in.
💡 Clearing cookies or switching browser doesn’t skip the wait. That’s deliberate, so someone guessing passwords can’t get round it.
Export your data (customers, appointments, payments and everything else)
Settings → Export Your Data. Download any list as a spreadsheet, or everything at once as a zip file. Filter by dates, team member and appointment status if you only need part of it.
- Go to Settings and click Export Your Data, or type “export” in the Settings search.
- To download everything, click Download all my data (.zip). You get one spreadsheet for each kind of information, plus a README listing what’s inside.
- To download just one thing, such as customers, appointments, payments, passes, gift vouchers, messages or reviews, click Download spreadsheet under it.
- To narrow it down, set From and To dates, a team member and/or an appointment status (booked, completed, cancelled or no-shows), then click Apply filters. The downloads and row counts update to match.
- Open the files in Excel, Google Sheets or Numbers.
💡 Dates filter each spreadsheet by its main date, such as the appointment date or payment date. Customers are narrowed to those who had appointments in your dates.
💡 Lists without dates, such as services and working hours, always download in full.
💡 Money is shown in pounds, not pence. Passwords, security keys and card details are never included.
💡 Only managers and admins can export, and every download is recorded in your audit log.
Your plan, card and invoices
Manage your subscription in Settings → Your Schedool Plan: choose a plan, update your card, see invoices or cancel.
- Go to Settings → Your Schedool Plan.
- See your current plan and trial end date.
- Choose a plan (Solo £15, Team £35 or Business £60 a month) and pay securely with Stripe.
- Use Manage billing to update your card, download invoices or cancel.
💡 Cancelling stops at the end of the period you’ve paid for.
💡 To change plan, see “Upgrade or downgrade your plan”.
Upgrade or downgrade your plan
Change plan in Settings → Your Schedool Plan → Change plan. Moving up takes effect straight away and charges the difference for the rest of the month; moving down starts from your next payment.
- Go to Settings → Your Schedool Plan.
- Under Change plan, pick the plan you want and click Change plan.
- Moving up (for example Solo to Team): you can add the extra people straight away. The difference for the rest of this month is charged to your card now, then the new monthly price applies.
- Moving down: the lower price starts from your next payment. You can only move to a plan that fits your number of bookable team members.
💡 During your free trial nothing is charged – the new plan’s price starts when the trial ends.
💡 If the card payment for an upgrade doesn’t go through, your plan stays as it was. Update your card under Manage billing, then try again.
💡 Schedool HQ can also change your plan for you – the same charges apply.
Set up an Enterprise plan or give a business Schedool free (Schedool HQ)
In Schedool HQ, open the business → Edit details to set Team members allowed and the Enterprise monthly price. Only the Schedool owner can make a business free of charge, from the business’s Billing section.
- Open Schedool HQ → Businesses and click the business.
- Under Edit details, choose Enterprise as the plan, then fill in Team members allowed and Enterprise monthly price. Save.
- The business sees its Enterprise price on Your Schedool plan and pays by card. If it already pays by card, its subscription moves to the new price straight away.
- To give a business Schedool free: in its Billing section, click Make free of charge (only the Schedool owner sees this). Set how many team members it gets under Edit details.
💡 Leave Team members allowed blank for the plan’s normal allowance – unlimited on Enterprise.
💡 Raising an Enterprise price charges the difference for the rest of the month now; lowering it starts from the next payment.
💡 Making a paying business free stops its Stripe subscription, so it isn’t charged again. Stopping free of charge means it needs to subscribe again.
💡 HQ staff can still give a set number of free months. Only you can make a business free with no end date.
Suggest a feature for Schedool
Settings → Suggest a Feature sends your idea straight to the Schedool team. You can see every idea you’ve sent and its status, and we email you when one is added.
- Go to Settings → Suggest a Feature.
- Write your idea in a few words, and add more detail if you like – what it would help you do.
- Click Send idea.
- Your ideas are listed below with their status: Sent, Planned, Done or Not planned, plus any reply from Schedool.
💡 When an idea is marked Done, the person who sent it gets an email.
Refer another business and get a free month
Settings → Refer a Business gives you your own link. When a business signs up through it and starts paying, you both get a month free.
- Go to Settings → Refer a Business (business owners and admins).
- Copy your link or share it on WhatsApp.
- The other business gets the normal 14-day free trial.
- When they start paying, a free month is added for both of you automatically, and you both get an email.
💡 If you’re on a trial or a free period, the month is added on the end.
💡 Paying by card? Your next payment simply moves back a month.
💡 This is different from Refer a Friend, which rewards your own customers.
See which businesses are going quiet (Schedool HQ)
Schedool HQ → Going quiet lists businesses that may be about to leave: no one signing in, appointments dropping, or a trial ending before they’ve set up.
- Open Schedool HQ and click Going quiet.
- Each business shows its status, last sign-in, appointments this week against a usual week, and why it’s listed.
- Click Email to send the owner a quick check-in, or open the business to look around.
💡 Trials are listed after 5 days with no sign-in; paying and free businesses after 14 days.
💡 Sign-ins are counted from the web and the app. Your own visits through HQ don’t count.
💡 Each business’s last sign-in is also shown on its HQ page.
See revenue over time (Schedool HQ)
Schedool HQ → Settings → Revenue over time shows monthly subscription revenue, paying businesses, how many started and stopped paying, and how many trials turned into paying customers.
- Open Schedool HQ → Settings → Revenue over time.
- See revenue now, paying businesses, and the share of trials (ended in the last 90 days) that are now paying.
- The chart and table show the last 12 months.
💡 Figures are recorded each hour from when this feature was added. Cancellations and website sign-ups before then come from your existing records.
Manage feature requests (Schedool HQ)
Schedool HQ → Requests shows ideas businesses have sent. Set each one to Planned, Done or Not planned and add a reply; marking it Done emails the person who sent it.
- Open Schedool HQ → Requests. The number shows new ideas waiting.
- Choose a status and write a reply if you like, then Save.
- The business sees the status and your reply under Settings → Suggest a Feature.
💡 The Done email is sent once per idea.
Show an announcement to businesses (Schedool HQ)
Schedool HQ → Settings → Announcements puts a short notice at the top of Schedool for the businesses you choose – all, paying, trial, free or one industry.
- Open Schedool HQ → Settings → Announcements.
- Write a headline, an optional message and link, and choose the type and who sees it.
- Pick the dates it shows, then Publish.
💡 Each person can dismiss it with the ×.
💡 Turn an announcement off at any time from the list.
Email product updates to businesses (Schedool HQ)
Schedool HQ → Settings → Product update emails sends an email to the owners of the businesses you choose. Every email has a link to stop updates, and anyone who uses it is left out automatically.
- Open Schedool HQ → Settings → Product update emails.
- Write a subject and message (leave a blank line between paragraphs) and choose who gets it.
- Click Send me a test to check it, then Send to businesses.
- Emails go out in batches over the next few minutes; the list shows progress.
💡 Only business owners and admins get these.
💡 People who stop updates still get account emails like receipts.
Check system health (Schedool HQ)
Schedool HQ → Settings → System health shows whether the reminder worker is running, failed emails and texts, the last messages from Stripe and Square, disk space and recent errors.
- Open Schedool HQ → Settings → System health.
- Green means fine, amber means worth a look, red needs fixing.
- If the worker hasn’t run for more than 15 minutes, check the cron job in cPanel is still set to run every 5 minutes.
Get a weekly email about Schedool (Schedool HQ)
Every Monday at about 7am the Schedool owner gets an email with revenue, new sign-ups, trials ending, businesses going quiet and website visitors.
- Open Schedool HQ → Settings → Weekly email to turn it on or off.
- Click Send me a test now to see it straight away.
Export or delete a business’s data (Schedool HQ)
On a business’s HQ page, the Data section lets the Schedool owner download everything held for it as spreadsheets, or permanently delete a closed business.
- Open the business in Schedool HQ and scroll to Data.
- Click Download all data for a zip of spreadsheets (passwords and secrets are left out).
- To delete: suspend or archive the business first, make sure any card subscription has ended, then open Delete this business permanently and type its name to confirm.
💡 Deleting can’t be undone – download the data first.
💡 Your HQ activity log and Stripe billing history are kept.
Business referrals (Schedool HQ)
Schedool HQ → Settings → Business referrals lists businesses that signed up through another business’s link, and whether the free months have been given.
- Open Schedool HQ → Settings → Business referrals.
- Each referral shows Waiting for first payment or Rewarded.
- Use Pause referrals to stop new rewards.
💡 A business can’t refer itself – sign-ups with the same owner email are ignored.
See who changed what
Settings → Activity History lists account changes in your business.
- Go to Settings → Activity History.
- See what changed, who changed it and when.
Switch between light and dark mode
Schedool starts in dark mode. Click “Light mode” in the top menu of any back-office page to switch – in the app it’s under More.
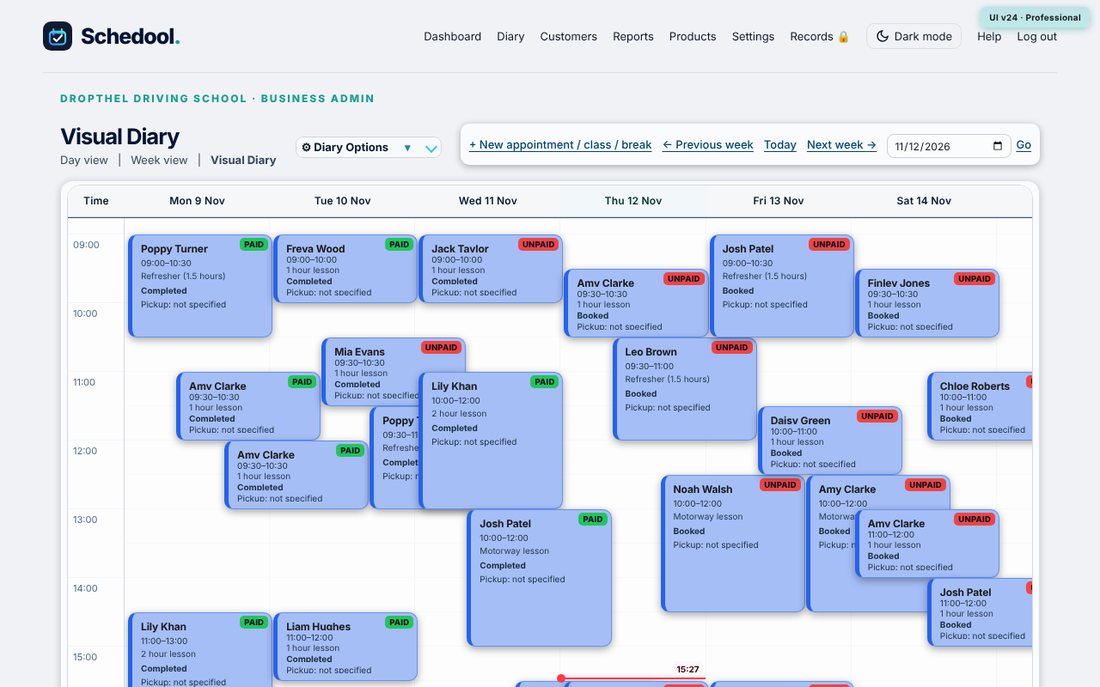
- On the computer: click “Light mode” in the top menu. Click “Dark mode” to switch back.
- In the app: open More and tap “Light mode” or “Dark mode”.
- Your choice is remembered on that device.
Use a Schedool discount code on your plan
Got a code from Schedool? Enter it on the secure payment page when you choose a plan, or under Your Schedool Plan if you already subscribe.
- Open Settings → Your Schedool Plan.
- Not subscribed yet: choose a plan, tap Continue to secure payment, then tap Add promotion code on the payment page.
- Already subscribed: type the code under Discount code and tap Apply code.
- The discount shows on your next invoice.
Find a setting quickly with search
At the top of Settings, type what you’re looking for – for example “export”, “holidays” or “reminders” – and only the matching settings are shown.
- Open Settings.
- Type in the search box at the top, e.g. export.
- The matching settings appear, with their groups opened. Click one to go to it – or press Enter if there’s only one match.
- Clear the box (or press Esc) to see everything again.
💡 Search understands everyday words too – “2fa” finds Two-Step Sign-In, “Square” finds Card Payments.
Add your business address and company details
Settings → Business Details holds your address, contact details, website, company number and VAT number.
- Open Settings and choose Business Details.
- Fill in what applies – everything is optional unless Schedool marks it required.
- Tap Save business details.
Turn on two-step sign-in
Two-step sign-in asks for a 6-digit code as well as your password. Choose an authenticator app (such as Microsoft Authenticator) or have the code emailed to you.
- Open Settings → Two-Step Sign-In.
- Choose how you get your code: Use an app (recommended) or Email me a code.
- App: open Microsoft Authenticator (or Google Authenticator, Authy, 1Password), tap + and add an “Other” account, then scan the QR code. Type the 6-digit code it shows and click Turn on.
- Email: we send a code to your email address. Type it in and click Turn on.
- Save your 10 backup codes somewhere safe – print them. Each one works once if you lose your phone or can’t get into your email.
💡 Tick Don’t ask again on this device and you won’t be asked on that device for 30 days.
💡 The mobile app asks for the code too. With email codes, tap Send a new code if it hasn’t arrived (check your junk folder).
💡 To switch between app and email, turn two-step sign-in off and set it up again.
Make two-step sign-in required for your team
Business admins can make two-step sign-in required for everyone in the team. Anyone who hasn’t set it up is asked to do so next time they sign in.
- Open Settings → Two-Step Sign-In.
- Under Your team, tick Everyone in my team must use two-step sign-in and click Save.
- The table shows who has it on. Each person picks their own method – app or email.
💡 Someone without it set up can’t use the mobile app until they set it up on the website.
Two-step sign-in for Schedool HQ
The Schedool owner can require two-step sign-in for everyone in the HQ team, and turn it off for any user who has lost their phone.
- Set up two-step sign-in for yourself first.
- Under Schedool HQ team, tick You and everyone in the HQ team must use two-step sign-in and click Save.
- To help a locked-out user: open their business in HQ, click Edit on the user and choose Turn off two-step sign-in.
Onboarding emails for new businesses (HQ)
Businesses that sign up on the website get three setup emails: day 1 (welcome and first steps), day 3 (first booking, or useful settings if they’ve started) and day 7 (a progress checklist). Each email only suggests what they haven’t done yet.
- Open Schedool HQ → Onboarding emails.
- Tick or untick Send onboarding emails to new businesses and click Save.
- Click a preview to see each email, or use Send me a test to get one in your own inbox.
- The Sent list shows every email that went out. If a business clicked “Stop them”, you can turn them back on.
💡 They’re sent from the platform mailbox by the notification worker (the cron job), so it must be running.
💡 Only businesses that sign up on the website get them – not ones you add in HQ. Suspended and archived businesses are skipped.
💡 Businesses can stop them with the link at the bottom of each email.
Change the email someone signs in with
An admin can change anyone’s sign-in email in Settings → Team. The old address gets an email telling them, so a change can’t go unnoticed.
- Open Settings → Team and click Edit next to the person (or yourself).
- Type the new email address and click Save.
- From then on they sign in with the new address – their password stays the same.
- The old address is sent a note saying the sign-in email was changed and by whom.
💡 If the business owner has no other admin, the Schedool team can change it from HQ.
💡 Customers change their own email by contacting the business – it’s on their customer details.
Open a business from Schedool HQ
From Platform control, click View next to a business to work in its diary and settings. You aren’t asked for two-step sign-in again, because you already used it to sign in to HQ.
- Sign in to Schedool with your HQ account (with two-step sign-in if it’s on).
- Open Platform control and find the business.
- Click View. You now see their diary, customers and settings.
- To go back, use the business switcher or open Platform control again.
💡 Anything you change is done as you, not as the business owner.
💡 Use it for support only, and let the business know before changing their settings.
📈 Grow your business
QR codes and a poster for the app
Settings → Get the App has two QR codes: one for you and your team, one for your customers. Print the poster for your counter or add the code to your website and social media.
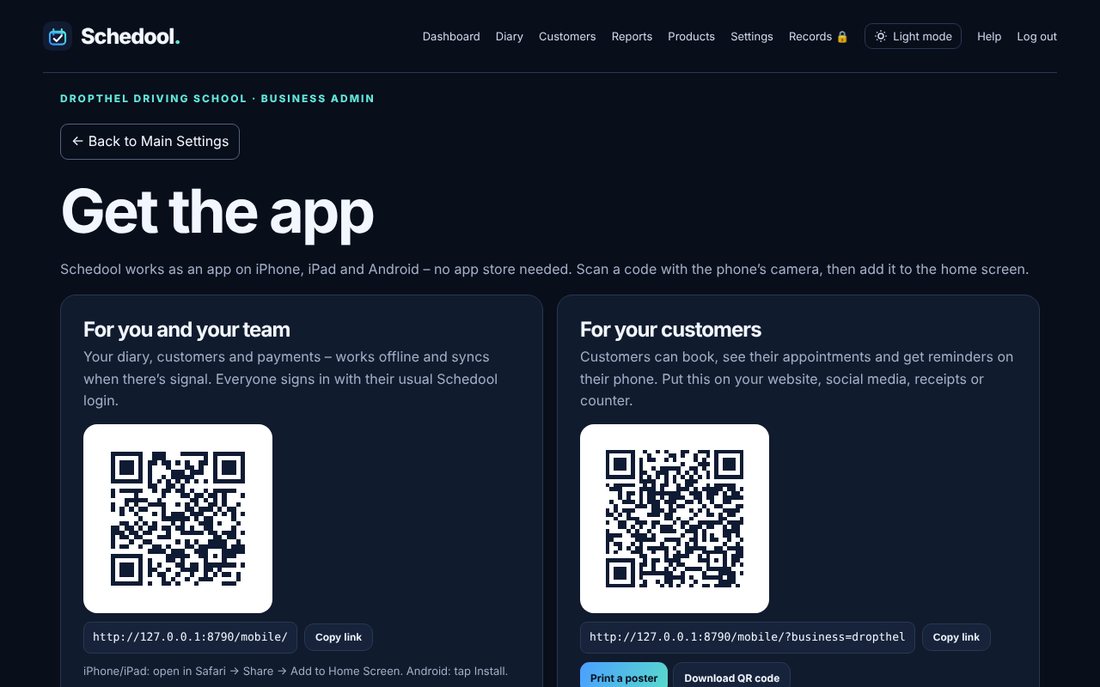
- Open Settings and choose Get the App.
- Your team scans “For you and your team” with their phone camera, then signs in with their usual login.
- Customers scan “For your customers”. It opens your own booking app, which they can add to their home screen.
- Tap Print a poster for a ready-made A4 poster, or Download QR code to use the code anywhere else.
- Copy link gives you the web address if you’d rather send it by text or email.
💡 Put the customer QR code on receipts, appointment cards and your shop window.
Use the waiting list to fill cancellations
When an appointment is cancelled, Schedool automatically emails (and notifies in the app) the first people waiting for that kind of time. It’s first come, first served – whoever books first gets it.
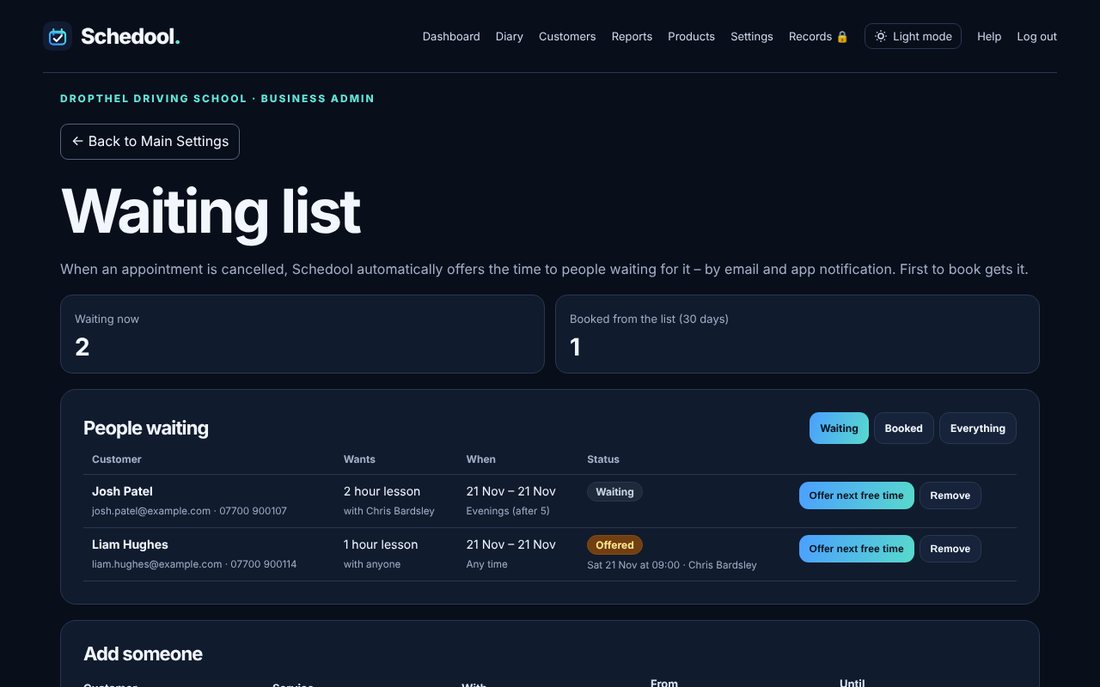
- Open Settings → Waiting List.
- Customers can add themselves: a “Join the waiting list” link appears on your booking page and in the app when they can’t find a time. You can also add someone yourself under Add someone.
- Each person chooses a service, who with (or anyone), the dates that suit and the time of day.
- When an appointment is cancelled, Schedool tells the first people whose wishes fit that time. Choose how many to tell at once under How many people to tell at once.
- To offer someone a time straight away, tap Offer next free time next to their name.
- When they book, they’re taken off the list automatically.
💡 Times starting very soon aren’t offered – set the cut-off under Don’t offer times starting within (hours).
💡 Untick Offer cancelled times automatically if you’d rather offer times yourself.
Create discount codes for customers
Settings → Discount Codes lets you create codes customers type when they book online or in the app, such as WELCOME10 for 10% off a first booking.
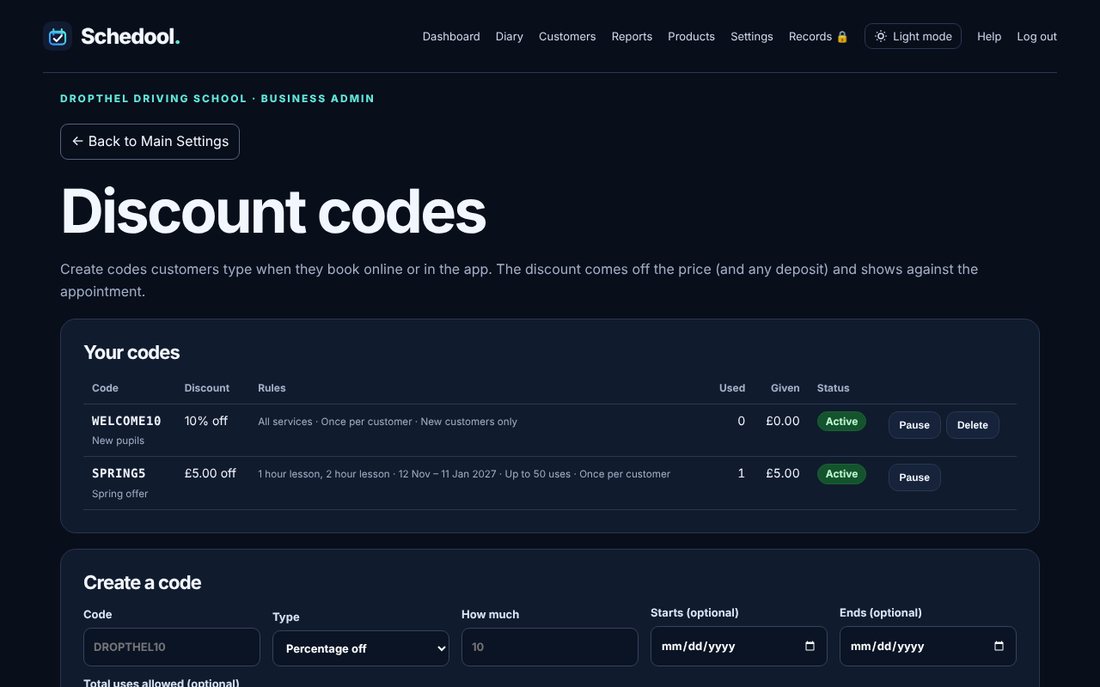
- Open Settings → Discount Codes.
- Type the code (for example SPRING5), choose Percentage off or Amount off, and how much.
- Optional: choose start and end dates, a total number of uses, and which services it works for. Leave all services unticked for every service.
- Choose whether each customer can use it once, and whether it’s for new customers only.
- Tap Create code, then share it in your marketing.
- Pause a code to stop it being used for a while, or Delete it.
💡 The discount comes off the price (and any deposit) and shows against the appointment, so it reads as part paid rather than unpaid.
💡 Reports shows how many codes were used and how much was taken off.
Ask customers for reviews automatically
Settings → Reviews can send customers a friendly email (and app notification) a few hours after their appointment, asking them to leave you a review. Reviews come back to you to approve, and customers are then offered your Google review page too.
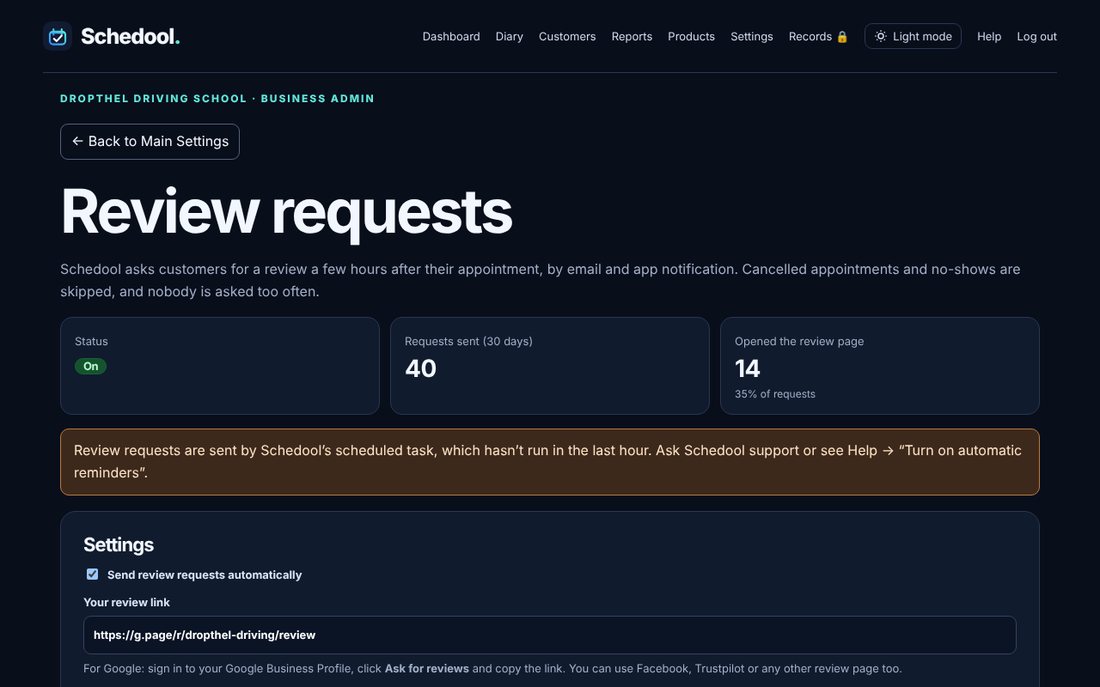
- Open Settings → Reviews and scroll to Ask for reviews after appointments.
- Optional: paste your Google review link (in your Google Business Profile, choose Ask for reviews and copy the link). After leaving their review on Schedool, customers are offered it too.
- Choose how many hours after the appointment to send it, and how long before the same customer is asked again.
- Change the subject and message if you like – [name] and [business_name] are filled in for you.
- Tick Send review requests automatically and save. Use Send me a test email to see what customers get.
💡 Requests are only sent for appointments that went ahead – not cancellations or no-shows.
💡 Everyone who had an appointment is asked, and everyone is offered your Google link whatever their rating – Google doesn’t allow asking only happy customers.
💡 Reviews from these emails are marked “Verified customer”.
💡 Requests need Schedool’s scheduled task to be running – see “Turn on automatic reminders”.
💡 You can also ask when you record a test result, or ask one customer any time with the Ask for a review button on their page.
Reports: takings, no-shows and busiest times
Reports (in the top menu) shows your takings, appointments, no-show and cancellation rates, busiest days and times, top customers, services and team – for any period.
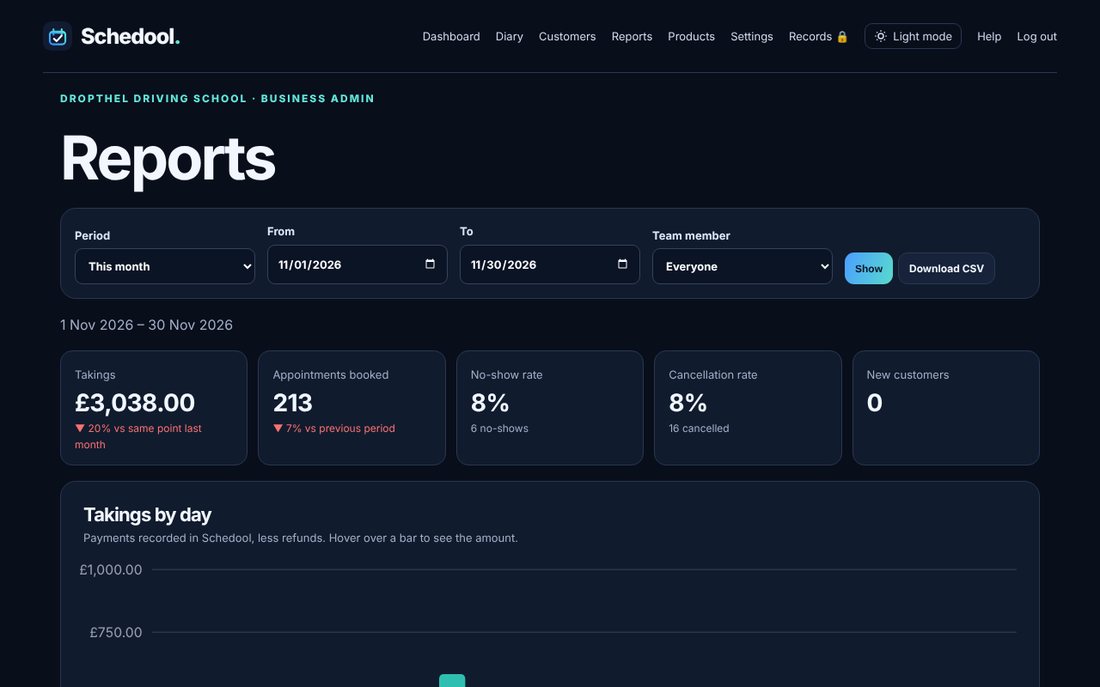
- Click Reports in the top menu.
- Choose a period (this week, this month, last 3 months and so on) or pick your own dates, and a team member if you like, then tap Show.
- The tiles compare with the previous period. While a period is still running, takings are compared with the same point last time.
- Scroll down for takings by day, week or month, a busiest-times heat map, top customers, services and team.
- Tap Download CSV to open the figures in Excel or Google Sheets.
💡 Takings are payments recorded in Schedool, less refunds. Discounts aren’t counted as takings.
Use discount codes on passes
When you create a discount code, choose whether it’s for bookings, passes or both, and which passes it covers. Enter it when you sell a pass, or customers type it on the pass page.
- Open Settings → Discount Codes and fill in the code as usual.
- Under Use this code for, tick Prepaid passes (and Bookings too if you like).
- Tick the passes it works for, or leave them all unticked for every pass.
- Selling a pass yourself? Type the code into Discount code in Settings → Prepaid Passes → Sell / assign a pass.
💡 The sale is recorded at the discounted price, and the code shows as used under Discount Codes.
Customer reviews – approve them and show them on your website
Customers give you a star rating and a comment. Nothing appears on your website until you approve it. Approved reviews and your average rating show in the Reviews tab of your mini booking site.
- Customers leave a review from the link in your review request email, or from Leave a review on your mini site (Reviews tab).
- You get an email for each new review. Open Settings → Reviews.
- Under Waiting for your approval, click Approve to put it on your website, or Don’t publish to keep it off.
- On approved reviews you can click Reply publicly – your reply shows under the review.
- You can hide or delete a review at any time.
💡 “Verified customer” means the review came from your emailed link, or from an email address of someone who’s had an appointment with you.
💡 Only the customer’s first name and initial are shown on your website.
💡 If you’ve added a Google review link, every customer is offered it after leaving their review, whatever their rating – that’s what Google’s rules require.
💡 Turn the Reviews tab off in Settings → Website Booking Widget if you don’t want it shown.
Sell gift vouchers
Sell gift vouchers from your own voucher page. Customers pay by card through Square and the voucher (a code like GV-ABCD-EFGH) is emailed straight away. It can be spent on online bookings or added to a customer’s credit.
- Connect Square first (Settings → Card Payments) so customers can pay by card.
- Open Settings → Gift Vouchers and tick Sell gift vouchers on my voucher page.
- Type the amounts to offer, separated by commas (for example 25, 50, 100). Tick Also let customers choose their own amount if you like, and set the lowest and highest.
- Choose how many months vouchers last (0 means they never expire) and click Save.
- Copy your voucher page link and share it – it’s also linked from your booking page (“Buy a gift voucher”).
💡 Customers can buy for someone else (with a message) or for themselves.
💡 Sold one in person? Use Create a voucher and add a note such as “paid cash” – tick Email the voucher to them to send it.
💡 Each voucher shows what’s left. You can email it again, cancel it, or make it usable again.
Ask for a review when a test result is recorded
When you record a test or exam result, Schedool can ask the customer for a review straight away. People who pass get a “Congratulations on passing!” message; anyone else gets your normal review message.
- Open Settings → Reviews.
- Under When a test result is recorded, tick Ask for a review when I record a test or exam result.
- Change the subject and message for a pass if you like – [name] and [business_name] are filled in for you.
- Save. From now on, setting a test’s result to Passed or Not passed sends the request.
💡 This works even if automatic requests after every appointment are turned off.
💡 Everyone is asked whatever the result, because Google doesn’t allow only asking happy customers.
💡 Customers review you on Schedool first, then are offered your Google review link.
Ask one customer for a review now
Managers can send any customer a review request whenever they like, from the customer’s page or in the app.
- Open the customer’s page (or tap them in the app).
- Choose Ask for a review and confirm.
- They get your review email, plus an app notification if they use your app.
💡 The customer needs an email address or your app.
💡 It uses the message you set in Settings → Reviews.
Refer a friend: reward customers who recommend you
Every customer gets their own booking link. When a friend books through it and has their first appointment, the customer gets account credit automatically – for example the price of a free lesson. You can give the friend a welcome credit too.
- Open Settings → Refer a Friend.
- Tick Turn on refer a friend.
- Enter the credit the customer earns for each friend (for example £35 for a free lesson), and a welcome credit for the friend if you like.
- Optional: change the wording customers see, then save.
- Customers find their link in their account on your booking site and in the app, with a Share button.
💡 Credit is given once the friend’s first appointment has happened – not if it’s cancelled or a no-show.
💡 Customers can’t refer themselves, and each new customer can only be referred once.
💡 The list on the same page shows every referral. Use Reward now or Cancel if you need to.
💡 Credit is spent automatically when the customer pays, like any other account credit.
📱 Mobile app
Install the Schedool app on your phone or iPad
Open schedool.net/mobile on your phone or tablet and add it to your home screen. It then opens full screen like any other app – no app store needed.
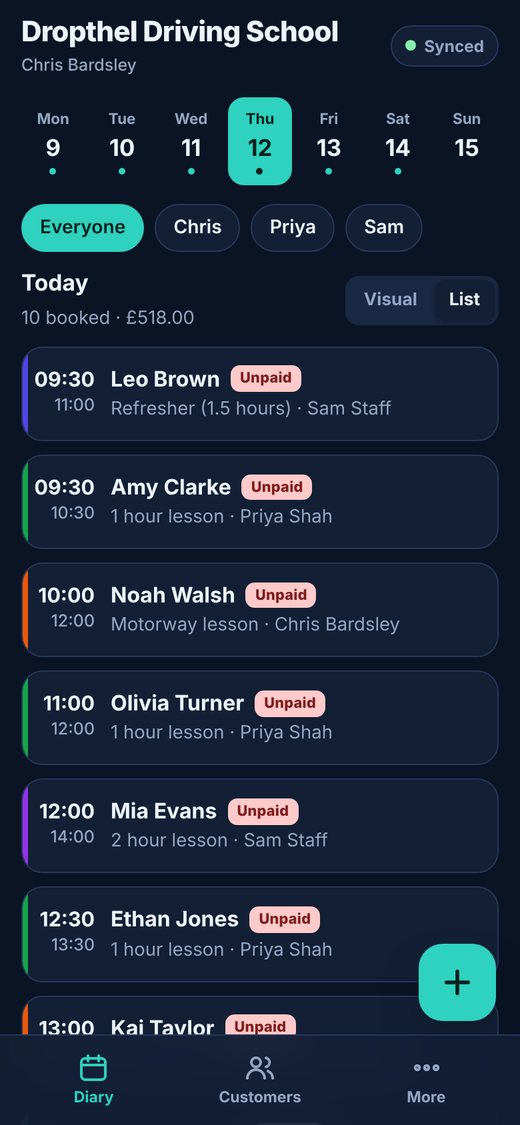
- On your phone or iPad, open schedool.net/mobile in the browser.
- iPhone or iPad: open it in Safari, tap the Share button, then “Add to Home Screen”.
- Android: tap Install when the banner appears, or open the browser menu and choose “Install app” (or “Add to Home screen”).
- Open Schedool from your home screen and sign in with your usual email and password.
💡 You only need to sign in once – the app keeps you signed in on that device.
💡 The More tab in the app has an Install button if you missed the banner.
Use the app without signal (offline)
Yes. The app keeps a copy of your diary and customers on the device, so you can view and change things with no signal. Changes are sent automatically when you’re back online.
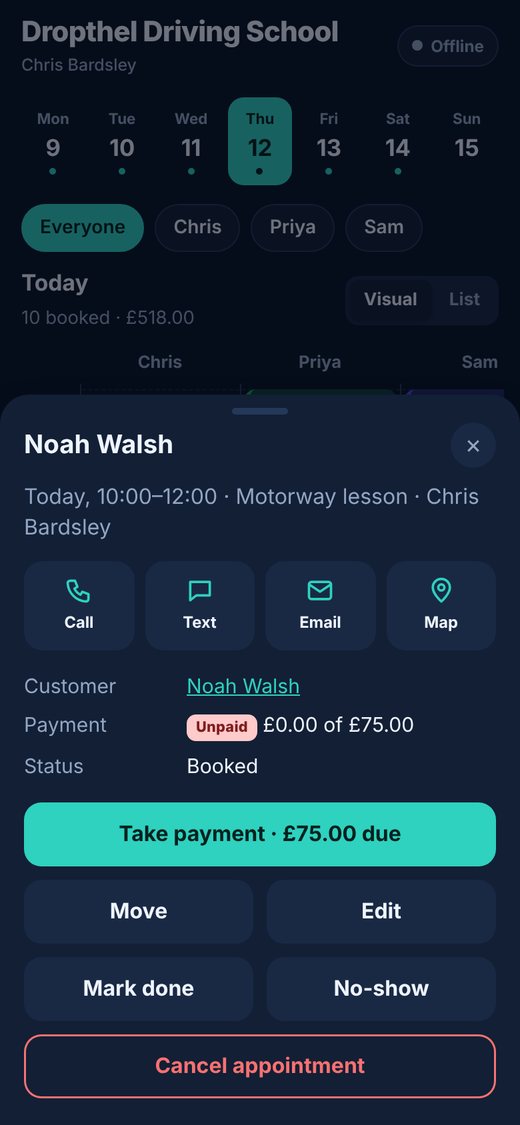
- Open the app once while online so it can download your diary and customers.
- With no signal you can still view the diary, add or move appointments, add breaks, mark appointments done or cancelled, record cash payments and add customers.
- The pill at the top shows “Offline · 2 to send” so you know changes are waiting.
- When you’re back online it changes to “Synced” on its own – you don’t need to do anything.
💡 Taking a card payment with Square needs a connection.
💡 Free times shown offline are based on the last sync, so a customer could book the same slot online meanwhile – the app warns you if that happens.
How syncing works in the app
The app syncs when you open it, when signal comes back, every minute while it’s open, and straight after you make a change.
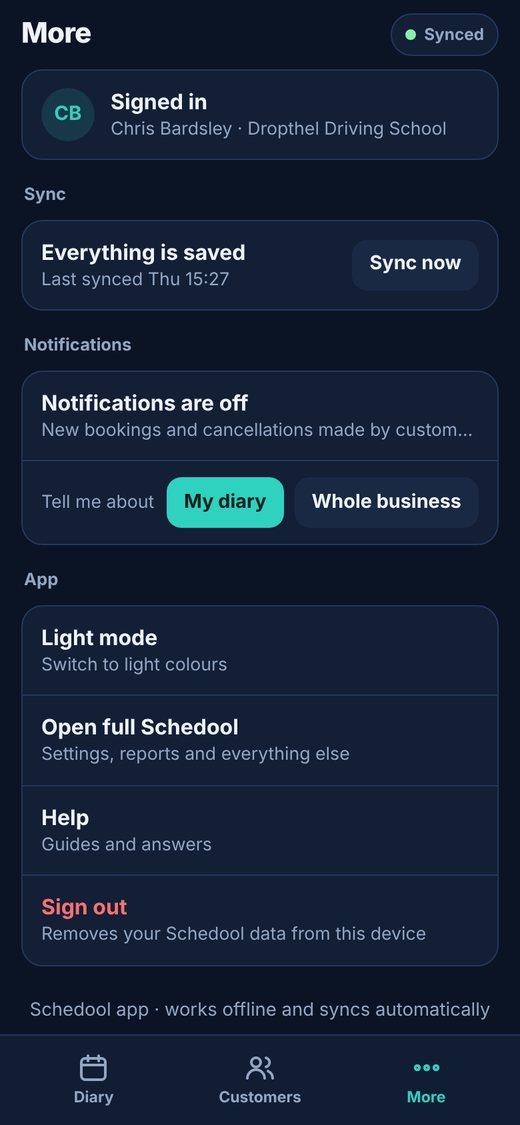
- Look at the pill at the top: “Synced” means everything is up to date.
- To sync straight away, open More and tap “Sync now”.
- Changes made on the computer show in the app at the next sync, and changes made in the app show on the computer once synced.
💡 Each change is only ever saved once, even if the signal drops halfway through sending it.
“Needs your attention” in the app
If a change made offline can’t be saved as it is – for example the time is now taken – the app asks you what to do instead of losing it.
- A message appears listing the change and the reason, such as a clash or a time outside working hours.
- Tap “Save anyway” to keep it, or “Undo” to drop it.
- Changes the server can’t accept at all are listed under “Needs your attention” so you can redo them.
Use the diary in the app
The app shows the whole week, 3 days, one day or a list – phones start on 3 days so nothing is squashed. Hold and drag an appointment, break or class to move it, drag the bar along its bottom to change its length, and tap an empty time to add an appointment, break or class.
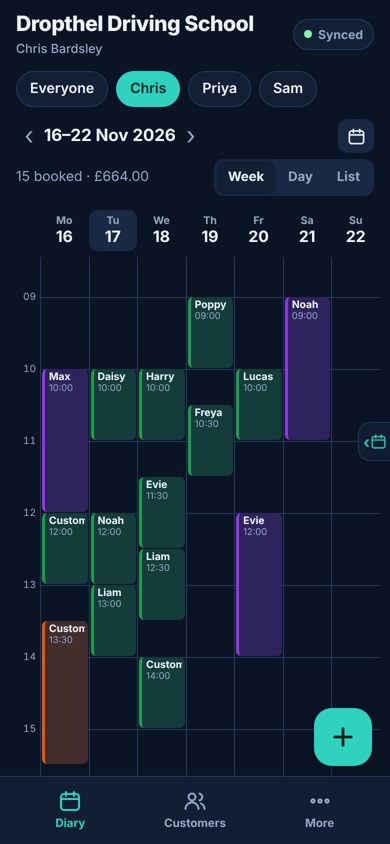
- Choose Week, 3 days, Day or List with the switch at the top. Phones open on 3 days, starting from the day you’re looking at; tablets and computers open on Week. The app remembers your choice.
- Use ‹ › or swipe left and right to move on or back (a week at a time in Week view, 3 days at a time in 3 days), and tap Today to jump back to today. In Week and 3 days you can also tap a week box (e.g. Nov 16 – 22) to jump to that week. Tap a day’s name to open that day.
- To move an appointment, break or class, hold your finger on it for a moment until it lifts, then drag it to a new time – or, in Week or 3 days view, to another day. In Day view you can drag an appointment across to another team member. Let go to save.
- To make it longer or shorter, drag the small bar along its bottom edge up or down. The new times show as you drag.
- Tap an empty time and choose Appointment, Break or Class. The time you tapped is filled in for you.
- On an iPad or computer, a month calendar sits on the left with that day’s appointments, breaks and classes listed underneath. Tap a date (or a day’s name above the diary) to see its list, and tap anything in the list to open or edit it. For more diary space, tap ‹ Hide (or swipe the panel left); tap the calendar tab at the left edge to bring it back. The app remembers your choice.
- On a phone, tap the calendar button or the calendar tab on the right-hand edge. The calendar slides in with the day’s list underneath – tap dates to look through them, then tap an appointment to open it. Dots show days with bookings.
- Tap an appointment to call, text, email or get directions, take payment, edit it, or mark it done or cancelled. The Week / 3 days / Day / List switch changes layout.
💡 If a move clashes with another booking or is outside working hours, the app asks before saving.
💡 A quick tap opens a booking; holding starts a move, so scrolling still works normally.
💡 When everyone is shown in Week view and bookings overlap, they show as coloured bars – pick a team member to see names and times.
Turn on app notifications
In the app, open More → Notifications. Staff are told when a customer books or cancels; customers get reminders, changes to their bookings and waiting-list offers – free, instead of a text.
- Open the Schedool app and tap More.
- Under Notifications, tap Turn on (managers choose My diary or Whole business).
- Allow notifications when your phone asks.
- To check it works, go to Settings → Get the App on the website and tap Send a test to my devices.
- To stop them, tap Turn off – or sign out of the app.
💡 iPhone and iPad: add Schedool to your home screen first and open it from there – Apple only allows notifications for apps on the home screen.
💡 If you blocked notifications by mistake, allow them for Schedool in your phone’s settings.
Update the progress record from the app
Update a customer’s progress record on your phone straight after a lesson – even with no signal. Changes are sent to Schedool when you’re back online.
- Tap the appointment in the app, then Record progress (or open the customer and tap their progress record).
- For each skill you covered, tap the level they reached.
- Add a lesson note if you like – the customer can see it.
- Tap Save progress.
💡 Only changed skills are saved, so nothing is overwritten by accident.
💡 Turn the record on and change its skills in Settings → Progress Record.
Get directions to your next pickup
On today’s list in the app, the card at the top shows your next appointment with a Directions button. Every appointment also has a Directions button that opens Apple Maps on iPhone and iPad, or Google Maps on Android.
- Open the app on today’s date in List view.
- At the top, the Today card shows how many appointments you have, money to collect and who’s next.
- Tap Directions to open your maps app with the pickup address (or the customer’s home address).
- Or tap any appointment and choose Directions.
💡 Set a pickup address on the appointment to use somewhere other than the customer’s home.
🙋 For your customers
How customers book online
Use the business’s booking link or Book now button, choose a service and time, and enter your details.
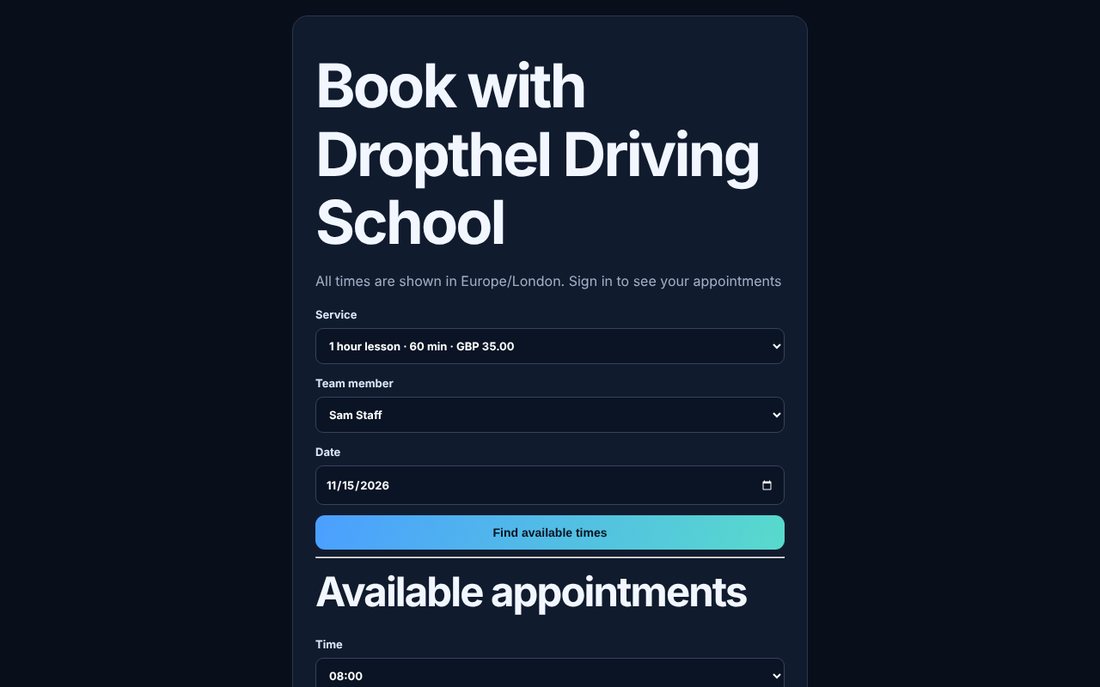
- Open the booking link or click Book now on the business’s website.
- Choose a service, team member and date, then click Find available times.
- Pick a time and enter your name, email and phone.
- Confirm. If a deposit is needed you’ll pay securely by card with Square.
Customer accounts: sign in and see your appointments
Customers can create an account on the business’s booking page to see upcoming and past appointments and book again.
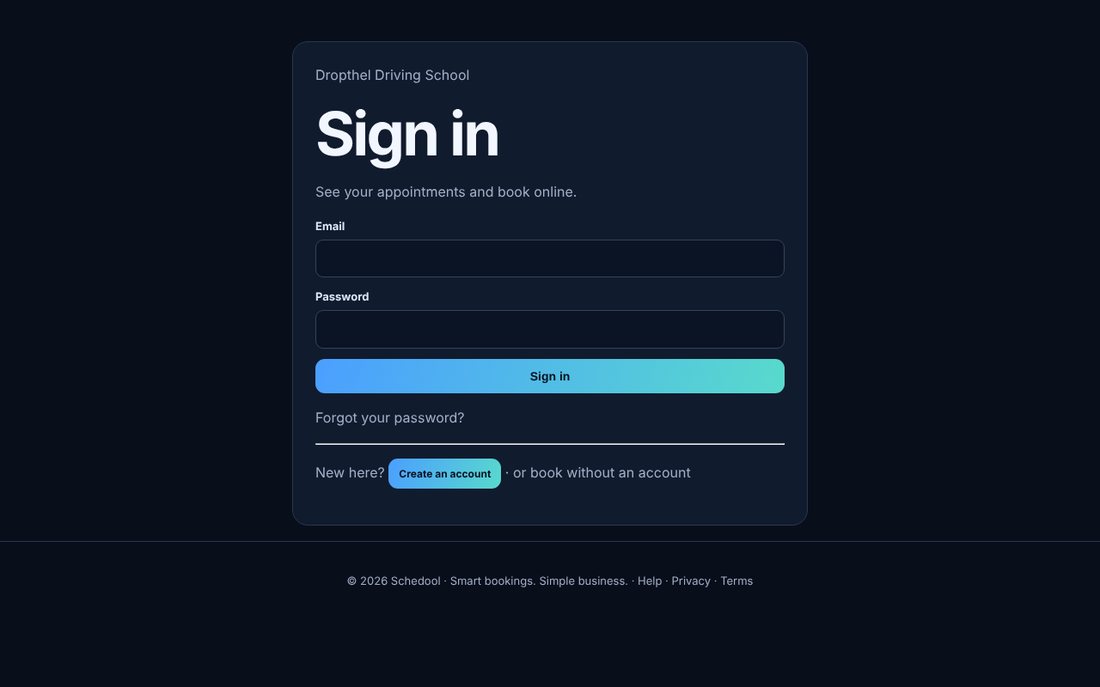
- On the booking page, click “Sign in to see your appointments”.
- Sign in, or create an account with your email.
- See your upcoming and past appointments and whether each is paid.
- Forgotten your password? Use Forgot password on the sign-in page.
How customers get your app
Customers don’t download anything from an app store. Share your customer QR code or link from Settings → Get the App – it opens your own booking app, which they sign in to and add to their home screen.
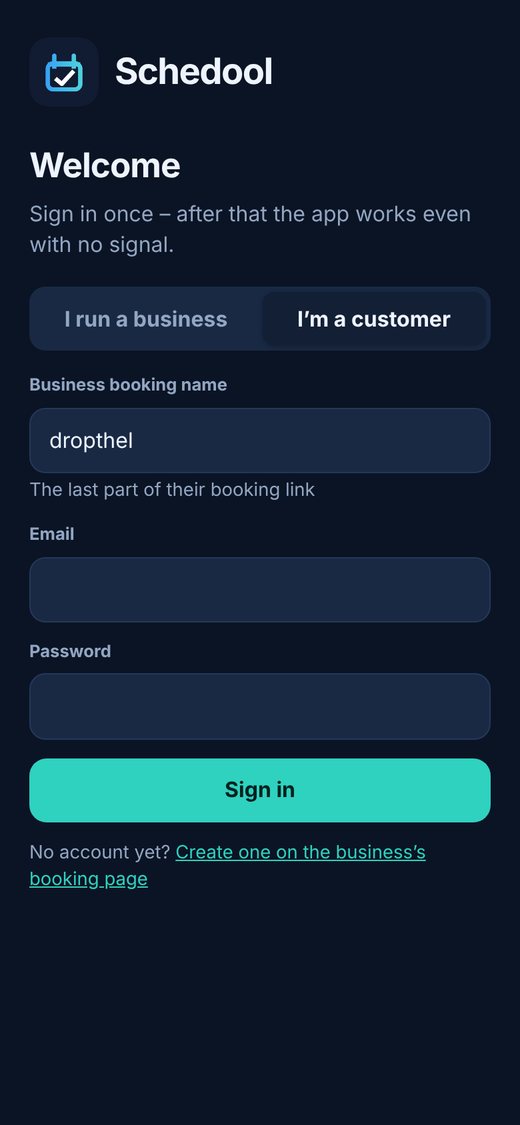
- Open Settings → Get the App and use the For your customers QR code: print the poster, download the code, or tap Copy link to send it by text, email or WhatsApp.
- The customer scans the code or taps the link, and your app opens on their phone.
- They sign in with their email and password. New customers create an account with the email you have for them, so their bookings and passes are already there. (You can also send an invite: open the customer → Invite to an online account.)
- To add it to their home screen – Android: tap the “Add to home screen” banner or Install in the Chrome menu. iPhone: tap Share, then Add to Home Screen.
- They open it from the home screen and tap More → Notifications → Turn on, so they get reminders, changes and your messages.
💡 In the app customers can book, change or cancel (within your rules), see passes, credit and payments under Account, and message you under Messages.
💡 iPhone only allows notifications once the app is on the home screen.
💡 Customers need a connection to book, because times are checked live – their upcoming bookings still show offline.
Join a waiting list (customers)
If you can’t find a time that suits, choose Join the waiting list on the booking page or in the app. You’ll be emailed as soon as a matching time comes up.
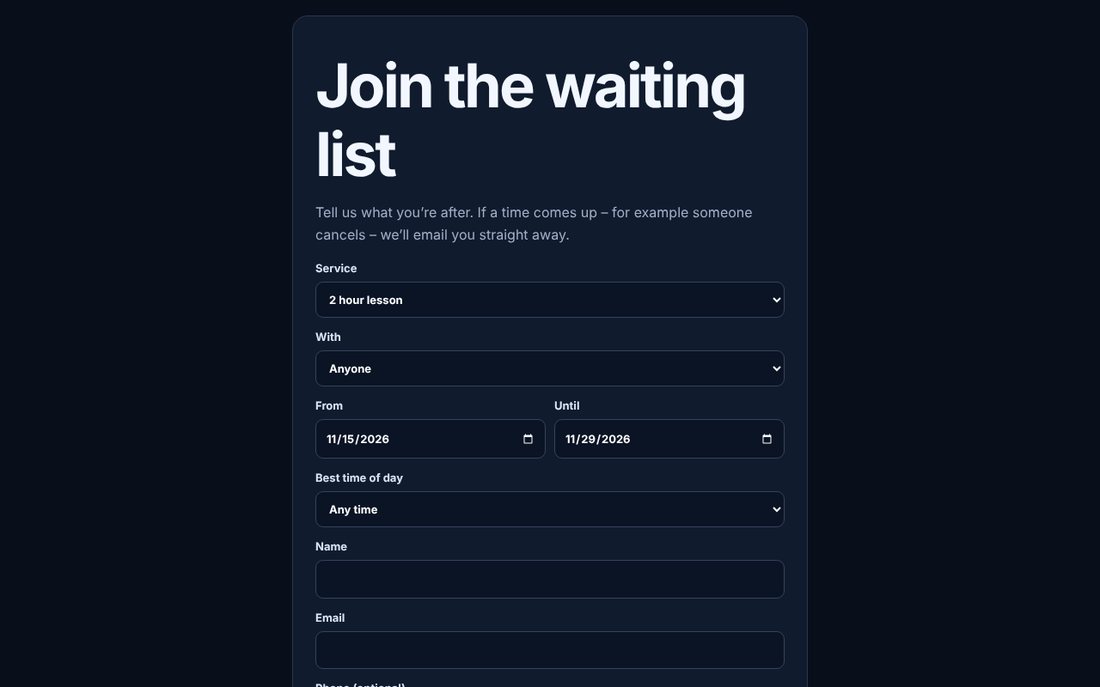
- On the business’s booking page (or in their app), pick the service and a date.
- Under the times, choose Join the waiting list.
- Choose who with, the dates that suit and the time of day, then confirm.
- When a time comes up you’ll get an email (and a notification if you use the app). Tap Book this time – it’s first come, first served.
- In the app you can see your waiting lists on the Bookings tab and tap Leave if you no longer need one.
💡 If the time has gone by the time you tap, you stay on the waiting list.
Use a discount code (customers)
Enter the code on the last step before you confirm your booking – in the Discount code box on the booking page, or under “Have a discount code?” in the app.
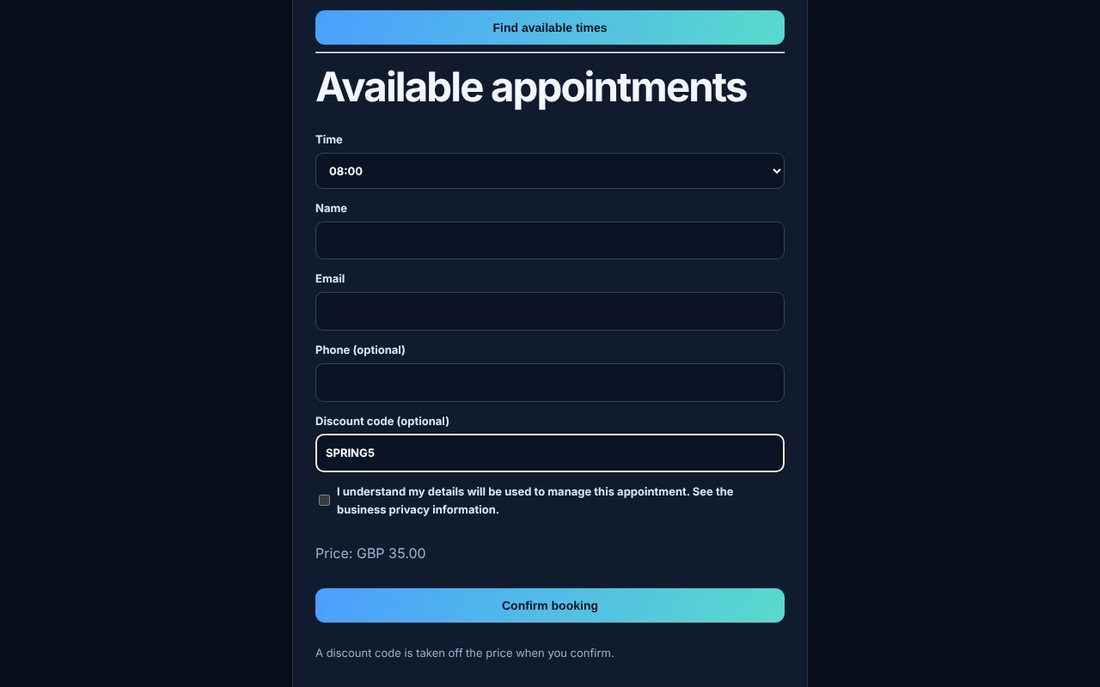
- Choose the service, team member, date and time as usual.
- On the booking page, type the code into Discount code. In the app, tap Have a discount code?, type it and tap Apply.
- The new price shows before you confirm.
- If the code isn’t accepted, the message says why – for example it has expired, it’s for new customers only, or it doesn’t cover that service.
See my passes, credit and payments in the app (customers)
In the Schedool app, tap Account to see the time left on your passes (and when they expire), any account credit, anything still to pay, and your payment history.
- Open the Schedool app and sign in as a customer.
- Tap Account at the bottom.
- At the top: time on your passes, your credit, and anything still to pay.
- Under Your passes, each pass shows the time left and when to use it by. Tap “Where the time went” to see which appointments used it.
- Payment history lists your payments, refunds, discounts and gift vouchers.
💡 On the Bookings screen, a strip shows your pass time, credit and anything to pay – tap it to open Account.
💡 If something looks wrong, contact the business – they can see the same details.
Book the same appointment again (customers)
In your account, tap Book again next to a past appointment. You’ll see the next free times for the same service with the same person – tap one to book it.
- Sign in to your account (on the website or in the app).
- Under Past, tap Book again next to the appointment you want to repeat.
- Tap one of the next free times, or pick another day.
- Check the details and confirm.
💡 If that person has no free times in the next three weeks, you can book with someone else.
Add an appointment to your calendar (customers)
Every upcoming appointment in your account has an Add to calendar button for Apple Calendar, Outlook or Google Calendar. It’s also on the screen you see after booking online.
- Sign in to your account and find the appointment under Upcoming (or Coming up in the app).
- Tap Add to calendar.
- Choose Apple / Outlook (opens a calendar file) or Google.
💡 If the time changes, add it again – the new one replaces the old one in most calendars.
Get a receipt for a payment (customers)
Your account lists your payments and refunds, each with a Receipt link. The receipt opens as a page you can print or save as a PDF.
- Sign in to your account. On the website scroll to Payments and receipts; in the app open Account → Payment history.
- Tap Receipt next to the payment.
- Use Print or save as PDF.
Choose your reminders (customers)
In your account, open Reminders and messages to choose whether you get email reminders and when, whether you get text messages, and whether you’re happy to hear about offers.
- Sign in to your account. On the website open Reminders and messages near the bottom; in the app open Account → Reminders and messages.
- Tick or untick email reminders and choose when: the business’s usual time, 2 hours, the day before or 2 days before.
- Choose texts and offers, then Save.
💡 You’ll always get booking confirmations and changes by email.
💡 Looking after someone on a family account? Switch to them first to set their reminders.
Book for your children or family (customers)
One account can look after several people. Add your children or anyone you book for, then switch between them to book, pay and see their progress.
- Sign in to your account.
- On the website, open Add someone under Your family; in the app, go to Account → Add someone.
- Enter their name (and who they are, if you like).
- Switch between people with the buttons at the top. Bookings you make are for whoever is selected.
💡 Reminders and receipts for family members come to you.
💡 Already a customer? The business can link your child’s record to your account from their customer page.
Change or cancel my appointment (customers)
If the business allows it, sign in to your account (or open the app) and tap Change or Cancel next to the appointment.
- Sign in on the business’s booking page (Sign in to see your appointments), or open their app.
- Find the appointment under Upcoming.
- Tap Change to pick a new day and time, or Cancel to cancel it.
- If you don’t see the buttons, it’s too close to the appointment or the business handles changes itself – please contact them.
Buy or use a gift voucher (customers)
Use the Buy a gift voucher link on the business’s booking page. To spend one, type the code in Discount or voucher code when you book.
- Open the business’s booking page and click Buy a gift voucher.
- Choose an amount, say whether it’s for someone else or for you, add a message if you like, and tick to agree to the terms.
- Pay by card on the secure page. The voucher is emailed straight away.
- To spend it, type the code in Discount or voucher code when you book.
💡 If a code isn’t accepted, check it hasn’t expired and that you’re booking with the same business that sold it.
Progress record (learning to drive record)
Record how each customer is getting on with each skill. Driving businesses start with the DVSA’s 27 skills and 5 levels (Introduced, Helped, Prompted, Independent, Reflection). Customers see their progress in their account.
- Open Customers, choose the customer, and tap Progress record.
- For each skill you covered, tap the level they reached and add a note if you like.
- Add lesson notes (what you covered and what to practise next) and choose which lesson it was.
- Click Save progress. Each change is kept in the history with the date and who made it.
💡 You can also update it in the app straight after a lesson, even with no signal – see “Update the progress record from the app”.
💡 Customers see their levels, notes and latest lesson notes when they sign in to their account.
💡 Staff can update the record for customers they teach; managers can update any.
💡 Pupils can move down a level as well as up – the history shows how they’ve got on over time.
Change the skills and levels in your progress record
Settings → Progress Record lets you rename, add, remove and reorder skills and levels, switch the record on or off, and choose whether customers can see it.
- Open Settings → Progress Record.
- Under Settings and levels, rename levels, describe what each means, add new ones or tick Remove (2 to 8 levels). Click Save settings.
- Under Skills, change the order number, group or name, tick Remove to hide one, or type new skills in the empty rows. Click Save skills.
- To go back to the official list, click Use the DVSA learning-to-drive list.
💡 Removing a skill hides it but keeps what you recorded before.
💡 Untick “Customers can see their progress” to keep the record just for you and your team.
💡 Any type of business can use it – add your own skills, e.g. for a course or training plan.
For customers: share your refer-a-friend link
If the business has refer a friend turned on, you’ll find your own link in your account and in the app. Share it, and when a friend books and has their first appointment, you get credit.
- Sign in to your account on the business’s booking site, or open their app.
- Find Refer a friend and tap Share my link (or copy it).
- Send it to a friend. When they book through it and have their first appointment, the credit appears in your account.
💡 Your credit is used automatically next time you pay.
🛠️ Fixing problems
No times show on my booking page
Usually one of four things: the service isn’t bookable online, working hours aren’t set, the person isn’t bookable, or the diary is full.
- Settings → Services: set “Who can book this service?” to online and in-house.
- Settings → Working Hours: save hours for the business AND the team member.
- Settings → Team: make sure the person is Bookable.
- Check the diary – breaks, classes, days off and imported calendar events block times too.
💡 Online bookings must be at least an hour ahead.
Emails aren’t arriving
Check the spam folder, the customer’s email address, and your Email Configuration.
- Ask them to check spam or junk.
- Check the email address on their customer record.
- In Settings → Email Configuration, send a test email.
- Check Settings → Notifications & Reminders → Notification history.
I can’t see where to enter card details
The card box appears only after you connect Square. The “Record a payment” form is just for payments taken another way.
- Go to Settings → Card Payments (Square) and click Connect Square.
- Approve the connection in Square.
- Open the appointment again and click Take payment – “Card payment with Square” now appears at the top.
“Choose a valid service, team member and start time”
The service or team member isn’t available for booking – for example the service was removed or the person isn’t bookable.
- Check the service is active in Settings → Services.
- Check the team member is Bookable in Settings → Team.
- Reload the diary (Ctrl+F5) and try again.
Lost your phone or can’t get your sign-in code
Type one of your backup codes instead of the 6-digit code. No backup codes? Your business admin (or Schedool) can turn two-step sign-in off for you.
- On the Enter your code screen, type one of your backup codes (like 1A2B-3C4D). Each works once.
- Once you’re in, go to Settings → Two-Step Sign-In and make new backup codes, or turn it off and set it up again on your new phone.
- App codes rejected? Make sure your phone’s time is set automatically, and use the newest code.
- Email code not arrived? Check your junk folder and tap Send a new code. Codes work for 10 minutes and only the newest one counts.
- No backup codes left? Ask your business admin to click Turn off (lost phone) next to your name under Settings → Two-Step Sign-In → Your team. Business owners can contact Schedool support.
💡 After someone’s two-step sign-in is turned off, they should set it up again straight away.
My booking widget shows a blank space
A blank widget is usually your web host’s anti-bot check blocking the booking page inside your site, or the snippet being pasted in the wrong place.
- Open your booking link (schedool.net/book/…) on its own. If you see a “One moment, please” or security check page, ask your host to allow schedool.net through their bot protection (often Imunify360).
- Copy the snippet again from Settings → Booking page and paste it into the page body, not the head or a header setting.
- If your site builder has an HTML or Code block, put the snippet in one of those.
- Reload the page and try on your phone too (with Wi-Fi off, to rule out your network).
💡 Website builders that strip scripts need the “Link” option instead of the embed snippet.
The app looks too big or squashed on my phone
The app fits itself to your screen and your phone’s text size. On narrow screens or very large text it switches to icons in the bottom bar and shows the diary a day at a time.
- Close the app fully and open it again so it loads the latest version.
- If everything (not just text) still looks zoomed in, check Chrome’s zoom: Chrome menu → Settings → Accessibility → Default zoom, and set it to 100%.
- On Samsung, Settings → Display → Font size and style and Screen zoom also change how big the app looks.
💡 If you open the customer app link on a phone signed in to the staff app, Schedool asks which one you want.
Ask the help assistant in the corner, or contact us and we’ll get back to you.